Taylored Expressions June Release – Love Deeply
June 9th, 2016
It’s Release Day at Taylored Expressions, so that means everything that has been peeked this week is now available! There were so many things I wanted to play with to show you today, but the thing I absolutely couldn’t resist was the new Fresh Florals stamp set along with the new TE inks!
When I was in the throws of purging from my stamp room last week, one of the things I found myself having trouble letting go of was floral stamp sets. So, naturally I took to Facebook to ask my stamping friends if I should let them go. These are people who had told me to purge practically every other item I had asked about all week. However, when it came to floral sets, the response I got from pretty much all of them was “You can’t have too many flowers!” That seems to be pretty universal among stampers. So you can understand my excitement over this new set!
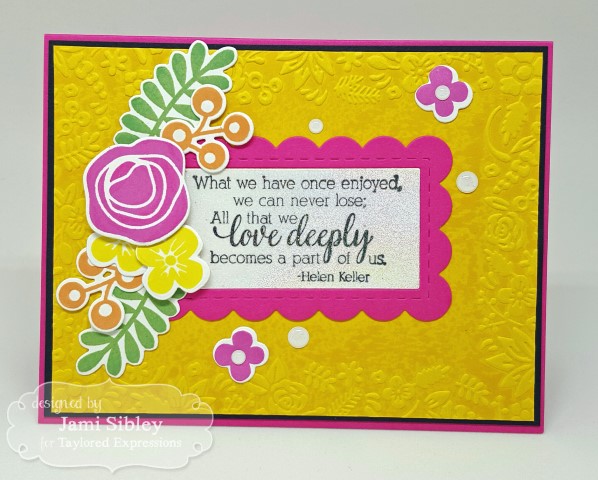
I paired the stamp set with the coordinating dies and the coordinating Garden Party embossing folder. I inked the inside of the folder with lemon Meringue ink and ran the same color cardstock through. The ink just makes the design “pop” more. The frame is from the new Frame in Frame 2 cutting plate. You know I can never get enough of the bright yellow and pink color combo!
For the sentiment I turned again the Care & Comfort – Pets. From the very beginning of this stamp set, I pictured this particular sentiment for lots more than sympathy cards.
I stamped the sentiment with Oreo ink on to the white cardstock and then I covered the whole little panel with Versamark and heat embossed it with kaleidoscope embossing powered. It’s so super sparkly and just gives the whole card such a special feel. This sentiment reminds us to love freely and deeply and to let go when we need to.
Head over to the TE Blog for links to tons of inspiration from the creative team! Thanks so much for stopping by today!

Taylored Expressions Peeks for June – The Love of a Pet
June 8th, 2016
Happy Wednesday! I’m excited to be playing along with the the Taylored Expressions June Release Sneak Peeks today. For all the info on the new products that will be available tomorrow morning (June 9th) and to enter to win a prize by answering the question of the day, you’ll want to hop over to the TE Blog.
I have been in the midst of a massive re-do of my stamp room, including paint, carpet, and a full-on purge! I took the week off work last week and hoped to be finished before returning to work this Monday. I got about 80% of the way there. So close and yet so far! LOL! That being said, it was a little bit of a challenge to get a card made for today. But I couldn’t miss previewing this sweet little stamp set, Care and Comfort – Pets. If you’ve been around my blog for long, you know how much we love our dogs! Over the past couple of years I have had several friends lose their beloved companions and it always breaks my heart. I want to send a card, but never feel like I have just the right thing. That’s where this little set comes in.
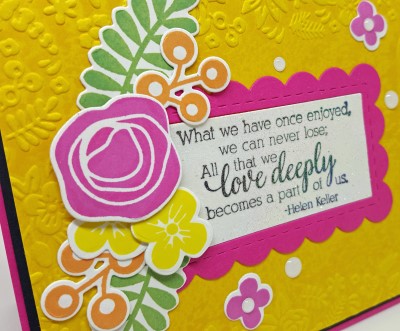
Care & Comfort – Pets has three beautiful sentiments to express how much you care. These all pair beautifully with the 4th sentiment which I stamped inside this card “So sorry for the loss of your beloved friend“. For this card I paired the stamp set with a new die set, Dog House Accessories. The card base was embossed with the TE Honeycomb embossing folder. I added a few Doodlebug dots for a finishing touch. I always prefer sympathy cards to have a simple and quiet feel to them.
Sympathy cards are never fun, but I think they are often the most appreciated when received. It’s important to have good stamps and dies at the ready in your arsenal to be able to make and send a card to show how much you care. And I think it’s important that those products make it as easy as possible to create something special. For that reason, I’m very excited about this super sweet little set!
Thanks for stopping by today. Be sure to check out what the rest of the TE creative team has in store! Links for the entire hop are on the TE Blog.
Taylored Expressions May Release – Happy Little Camper!
May 5th, 2016
Happy May 5th! It’s Cinco de Mayo, National Day of Prayer, my niece’s birthday, AND it’s Release Day at Taylored Expressions! I’m excited to play along with the TE Creative Team today in showing off all the new products available today in the TE Webstore!
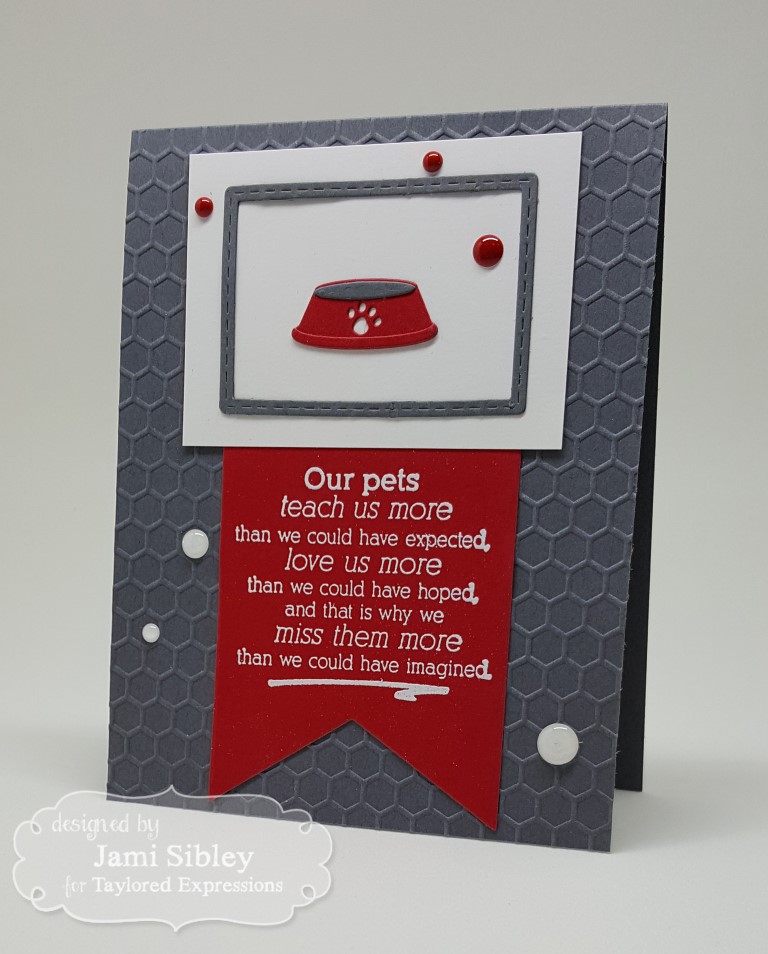
If you’ve visited my blog much in the past, you know that we have a 5th wheel trailer that we LOVE! So, I was especially enamored with the idea of this adorable little trailer die – On the Road Camper, along with the coordinating petite stamp set RV We There Yet?
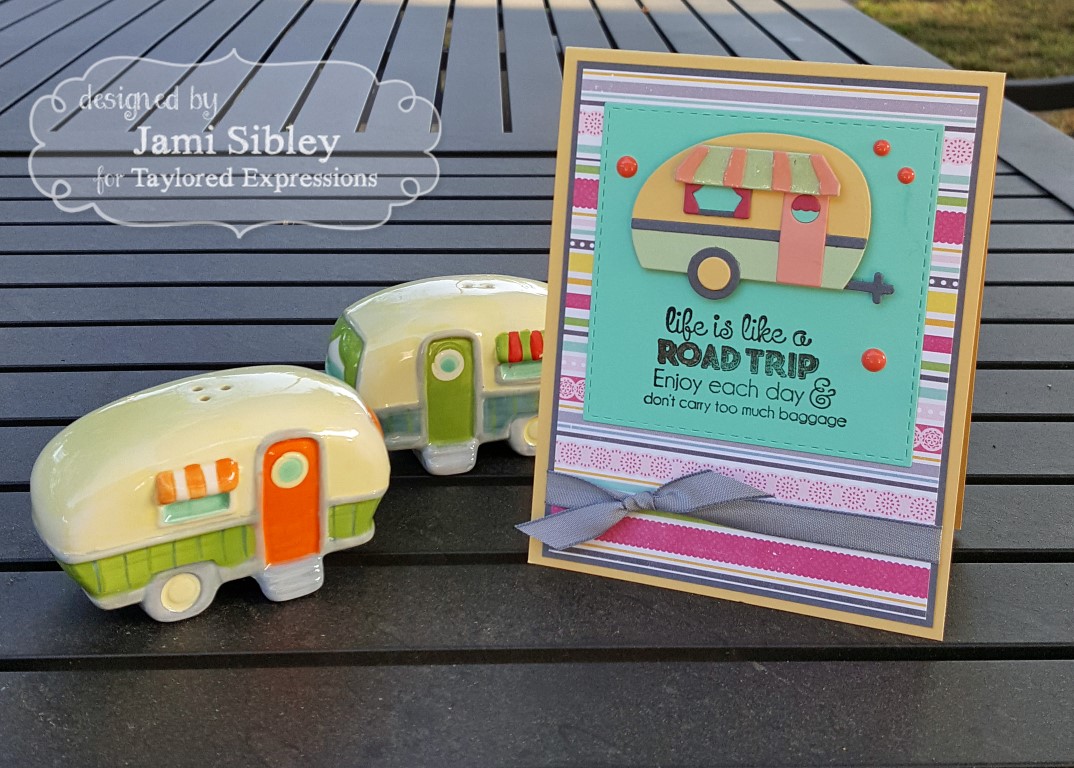
Friends gave us these little salt and pepper shakers that usually sit on my kitchen table. I used them for the color inspiration for my die cut trailer here. Patterned paper is Echo Park Petticoats and Pinstripes. Usually when I plan to use patterned paper, I start there to choose what colors to use, but in this case it was just serendipity that this new paper pad happened to have a sheet that went perfectly with the trailer I had already put together!
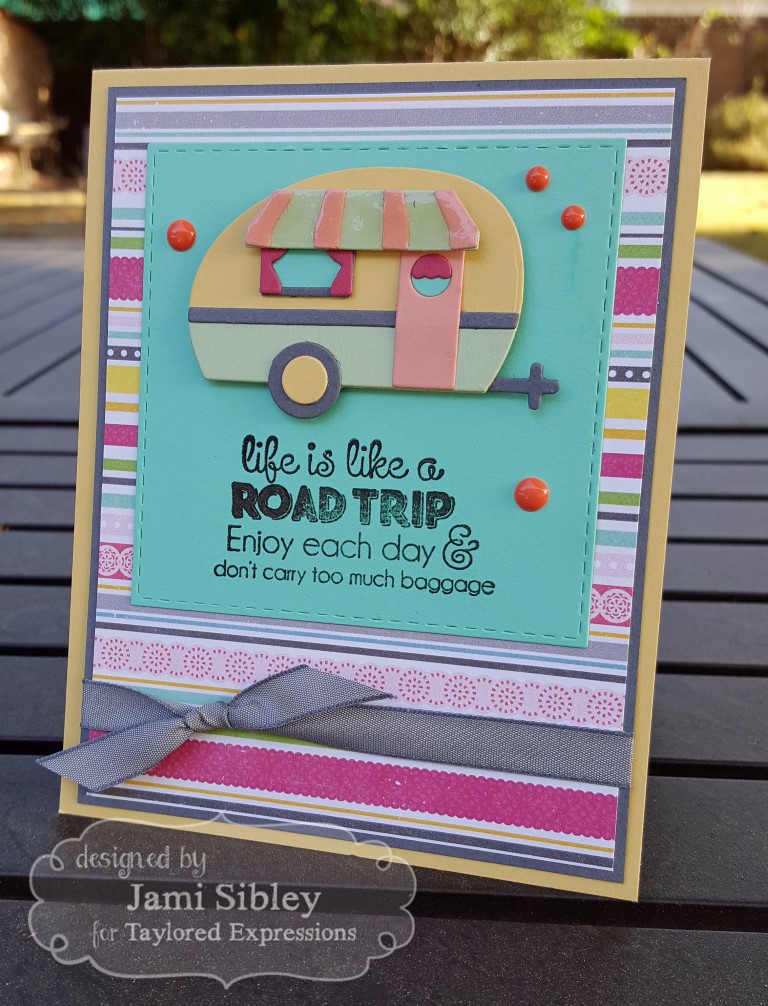
I mentioned that today is my niece’s birthday. She has gone on a camping trip to the Grand Canyon to celebrate, so I thought this card would be the perfect birthday card for her! And isn’t that sentiment so true?
 I have to point out that I made a couple of “mistakes” when putting my little trailer together. Do they matter? Nope, I don’t think so. The only reason I point them out, is to show that despite any little
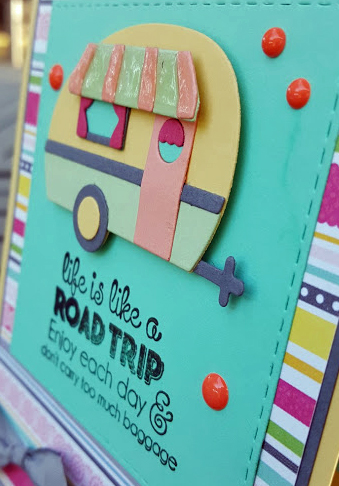
foibles, it’s all good! Can you find my two mistakes? Well the main one was that there are 4 little stripes that go on the awning and I started by adhering them at one end. I later realized that they were designed to go in the opposite spots. Oh well. The other thing I did – I noticed several other designers did as well – I put the curtains on the outside of the window frame. Oops! Haha! Live and learn!
Mistakes aside, I think this little trailer is DARNED CUTE! I’m anxious to play with it in lots of different color combos. Wouldn’t it be great on the cover of a travel journal?
All the new TE products for May are now available. Before you head over to shop, be sure to hop to the TE blog to get lots of inspiration from the creative team!
Thanks so much for stopping by!
Taylored Expressions March Peeks – Have a Seat!
March 1st, 2016
Happy March! Wow – it’s March already? I’m happy to get to play along today with the Taylored Expressions sneak peeks this month! I have a couple of cards to share today. They were both cards I needed to get right into the mail, so I snapped quick pics.
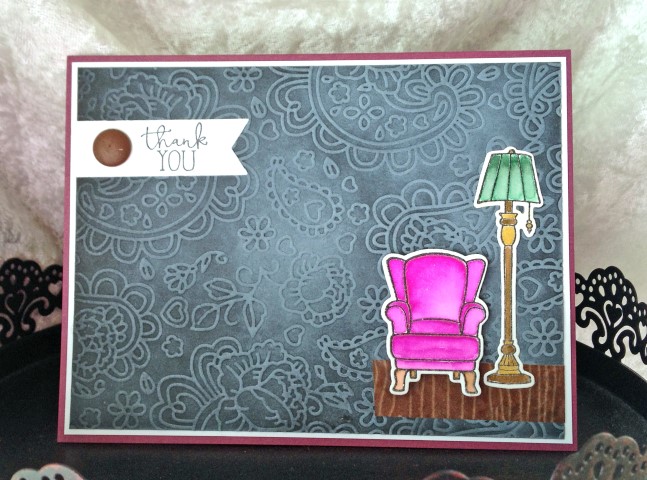
This first card features two new stamp sets: Sit & Chat and Let’s Talk Sentiments. Plus the coordinating dies for Sit & Chat.
Super simple card that I made for a friend who house-sits/dog-sits/bird-sits for us when we go away. With all that sitting, I thought the chair image would be perfect! Images were watercolored with Zig markers. Background is the TE Paisley Embossing Folder on Oreo cardstock. Then I sponged some white ink over it. The look is a little more subtle in person. I’ve loved the Sit & Chat set from the moment I first saw the initial illustrations. I can’t wait to play with it a lot more!
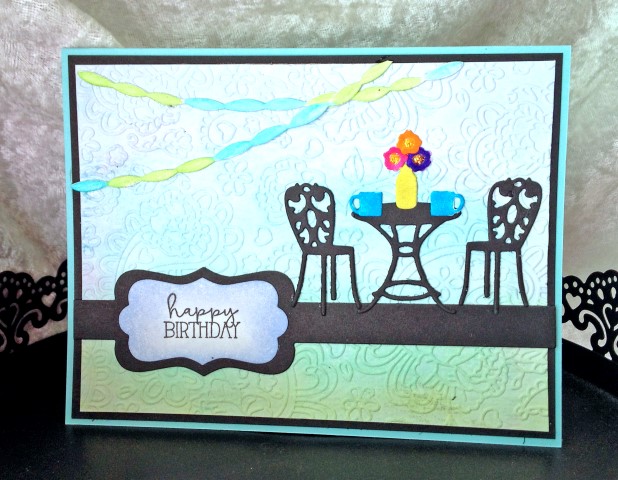
My second card features a totally different type of chair. This is the new Build-a-Scene Bistro die set (it comes with the cups and vase and flowers!) Once again I used the Paisley embossing folder for background. This time I used watercolor paper and before embossing, I used the smoosh technique with some distress inks. The sentiment is again from the new Let’s Talk Sentiments stamp set. It was stamped on the Band It die. The Let’s Talk Sentiments were designed to go with the three new Bubble dies, but honestly it’s just a great little set that covers practically everything and along with the Bubbles it works well with both of the Band It dies as well as lots of other smaller tag and frame dies! It’s just right when you need a smaller sized sentiment!
This card was created for a friend who I so wish was close enough for a lunch date, but for the moment we’ll share coffee across the miles with this scene.
Thanks so much for stopping by. Be sure to head over to the TE Blog to follow the hop today and see what the Creative Team has cooked up! You’ll also want to answer Taylor’s question of the day to be entered into today’s prize drawing!
Taylored Expressions November Peeks – Calendar Critters
November 4th, 2015
Buckle your seat belt – I have a lot of stuff to share today as part of the Taylored Expressions November Sneak Peeks! You know that I’m always excited about TE releases, but I am over the moon about this particular suite of products:
Calendar Critters stamp set
Calendar Critters Coordinating Dies
Critter Correspondence stamp set
Build a Scene Calendar dies
Have you seen the cute 3×4″ pre-printed calendars that TE has had in the store the past couple of years? I have tried/wanted/hoped/wished to decorate these for gifts, but have never accomplished the task. While there are many possibilities for stamps and dies to work with those calendars, I wished for a cute, contained set that would simply cover all 12 months and fit just right. Well… here you go! Danielle illustrated these little critters and she hit it out of the park! Are you ready to see some samples? Grab a cuppa and here we go…. (click on any photo to see it larger.)

The Calendar Critter stamp set includes 12 adorable critters along with a word or short phrase for each month of the year. Let’s see some close-ups.
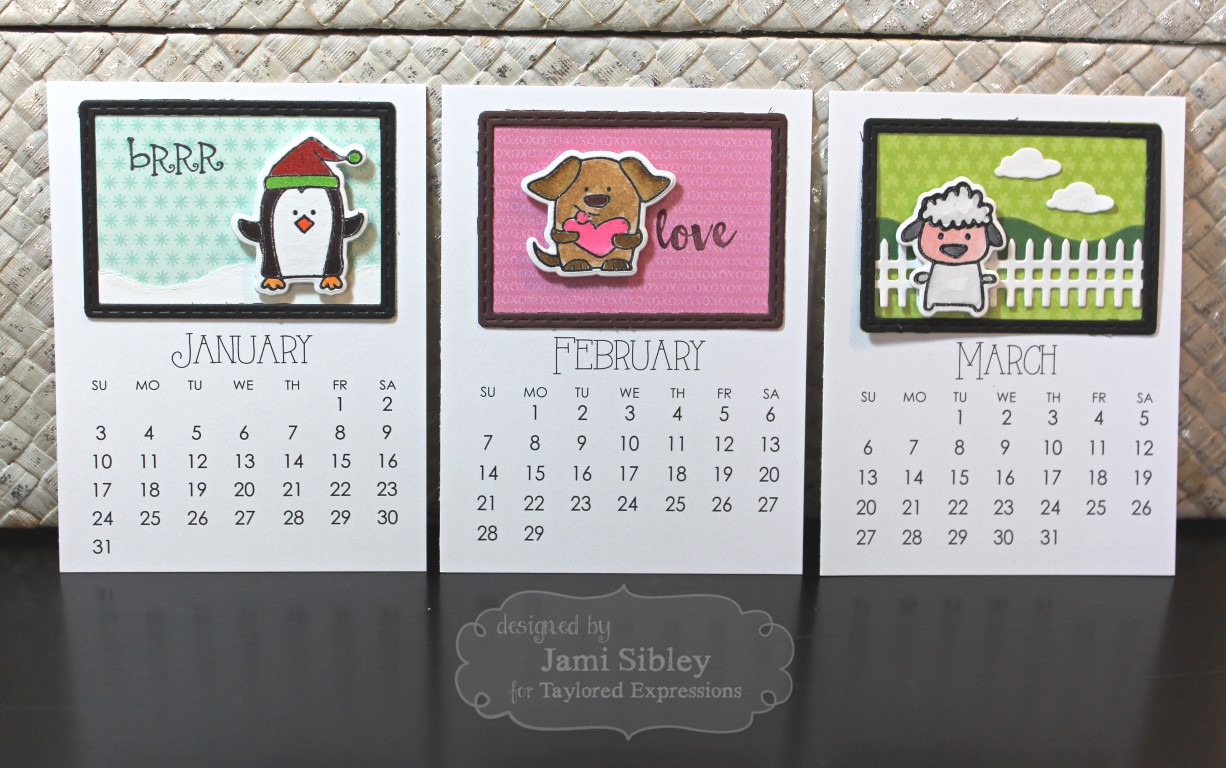
Of course there is a coordinating die set, so each little critter can be cut out. I popped all mine up on foam tape.
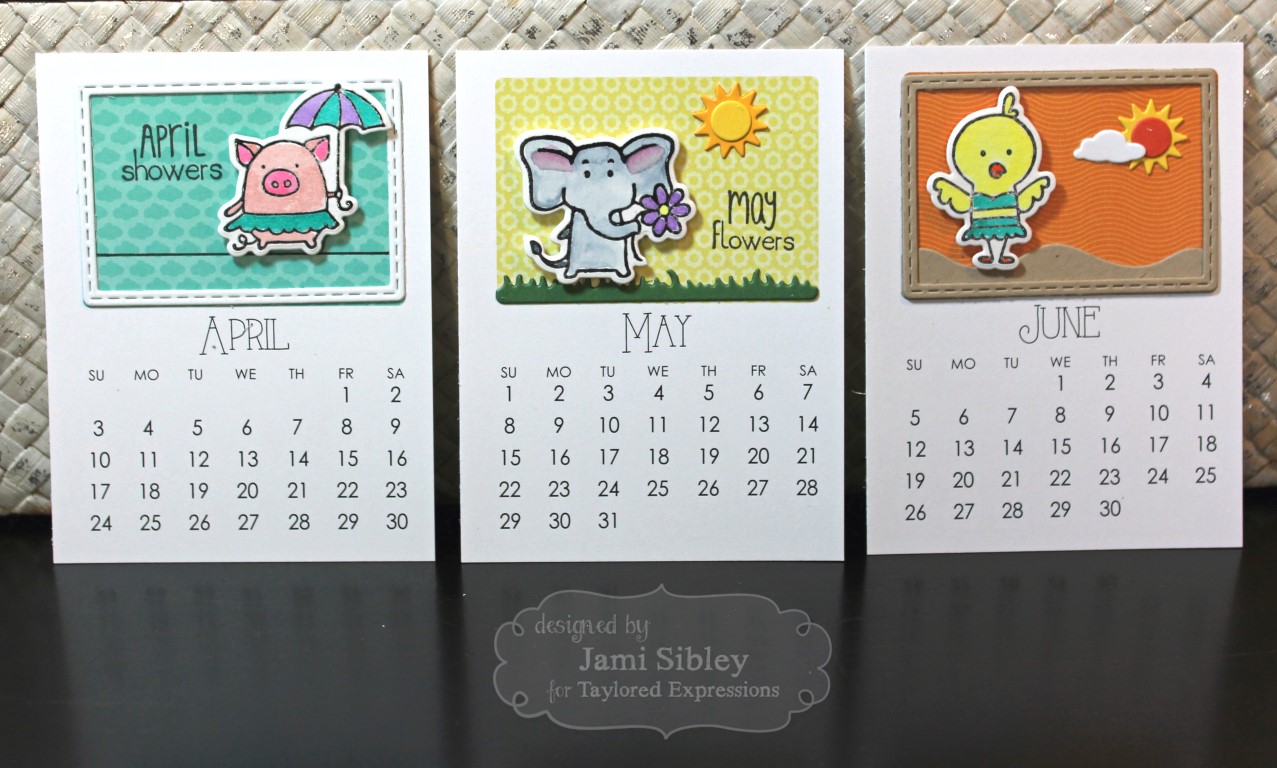
Plus, we have this perfect little die set called Build a Scene – Calendar. It includes a stitched frame, a mini rolling hill, mini grass, fence and sky stuff (cloud, sun, moon). ACK! Cute or what??
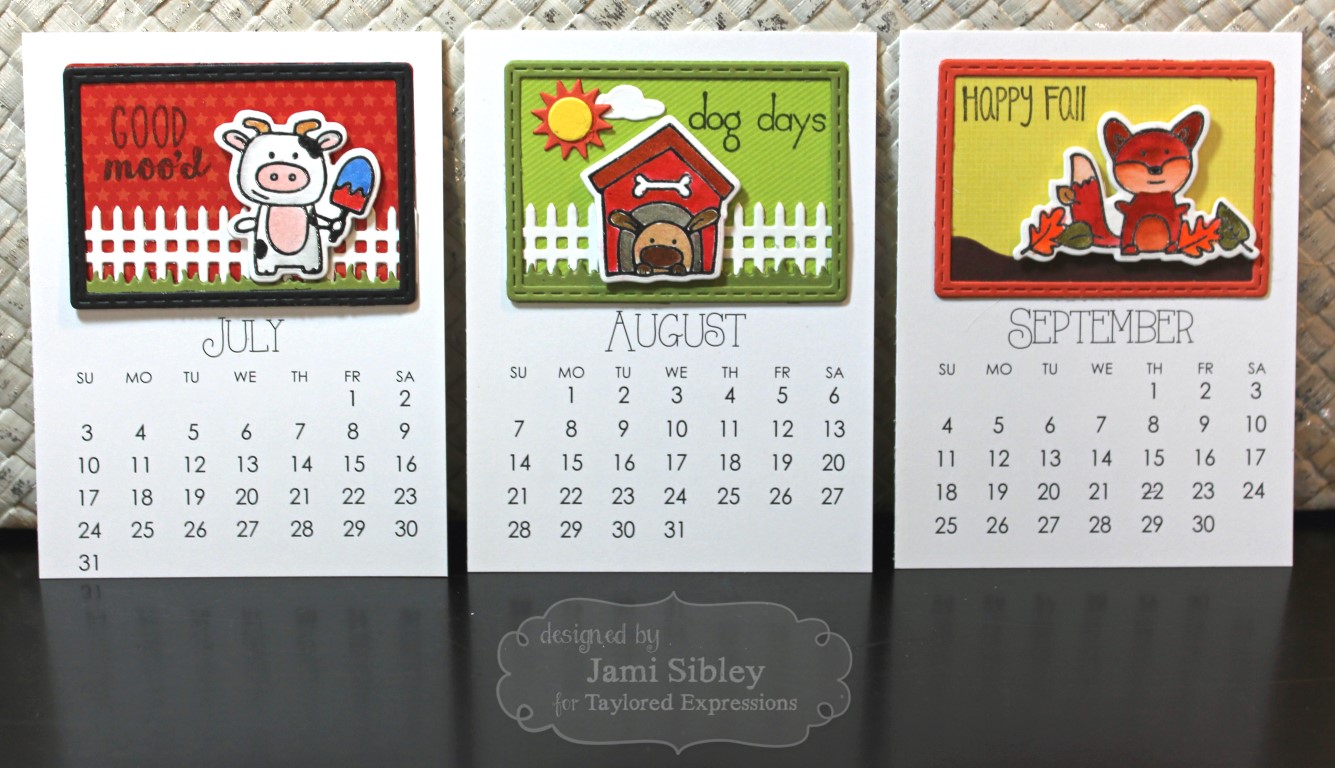
So, with the one stamp set and two die sets, there are almost endless possibilities for ways to put together calendar pages!

Seriously, how can you resist this! But, wait! There’s more! The Critter Correspondence stamp set supplies you with 12 sentiments to make each critter the focal point of a card! Creating card sets has always been one of my very favorite stamping projects. I had so many ideas for these sets, that instead of creating one set of 12, I decided to make 3 sets of 4 to show some different possibilities.
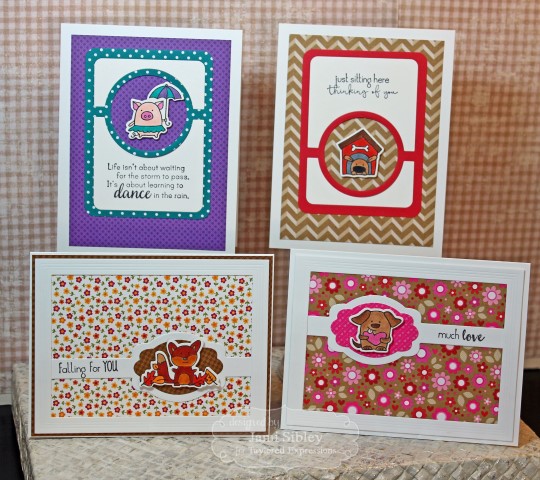
In this set, I’ve used the largest of the Frame in Frame dies along with the Band It 2 dies on the bottom 2 cards. On the top two cards I used the Circle Showcase die. I have to tell you something really funny. When we were developing the concept for this set, I actually dreamed of the pig image. I saw a pig in a tutu holding an umbrella and walking a tightrope. When I woke up, I immediately e-mailed the idea to Taylor. I thought for sure she would just laugh and think I was crazy, but she actually asked Danielle to draw it! I love it so much!
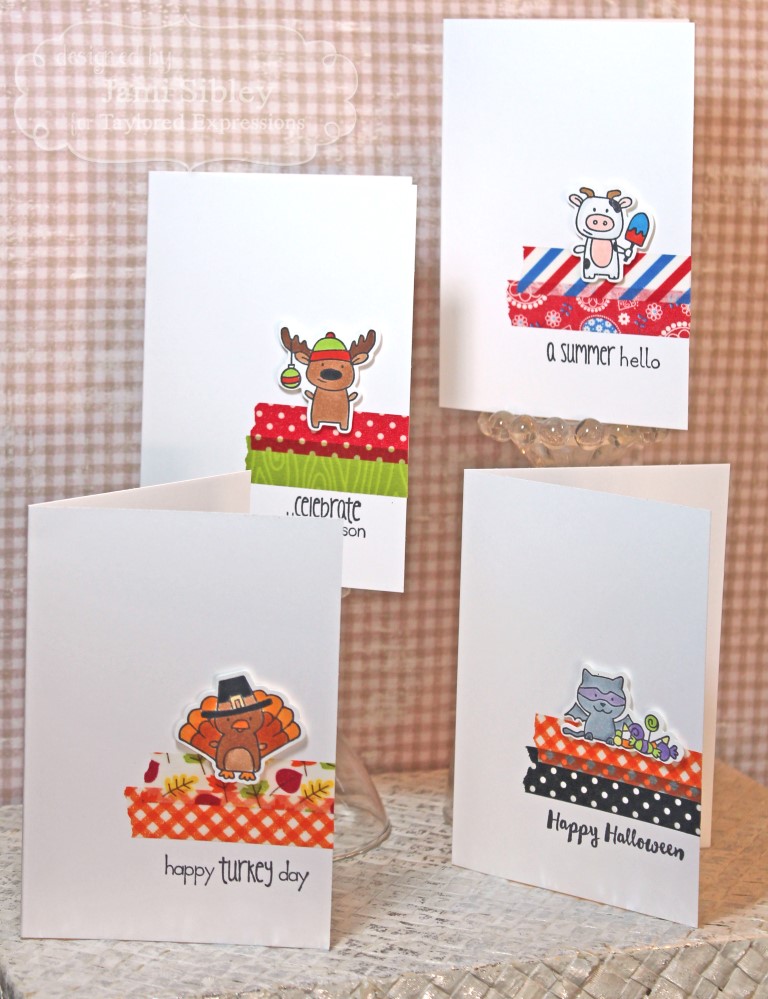
Here’s a really simple set that allowed me to dig into my washi stash. It would be awesome to make all 12 of these and give them as a gift! Another plus – the coloring is quick and simple.
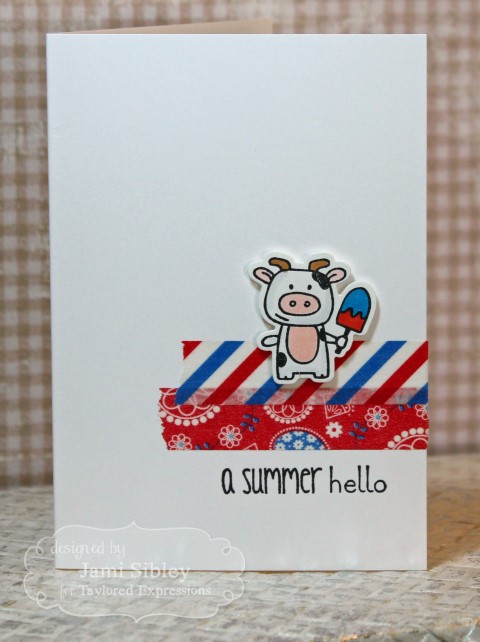
This cow holding a popsicle is another one of my favorite images!

For my 3rd and final set, I had the idea of creating a watercolor wash background for each image. I had some small pieces of Tim Holtz Ranger watercolor cs leftover from a previous project. I used my new Zig watercolor markers to scribble onto an acrylic block and smooshed that on to to little panels. Once that was dry I spritzed them with Sheer Shimmer Spritz – Sparkle. So so pretty in person! For a little extra interest I used the two new TE embossing folders Lots of Dots and Braided. This time I used the stitched frame die from the Build a Scene – Calendar set.

So, you can see that there are tons and tons of possibilities for these super cute little critters! I have a couple of really quick tips for using these stamps ans dies.
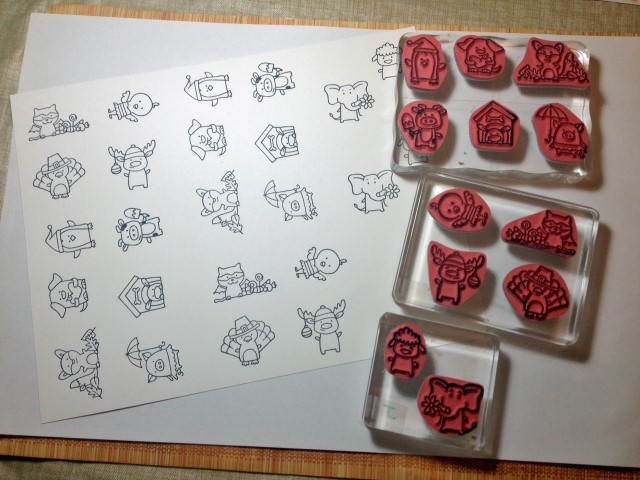
First of all – don’t stamp the critters individually. They would fit on 2 large blocks, or as I have done here on one large block, one medium and one smaller block. If you are going to make multiple sets, go ahead and stamp several pages while you have them out. You can get two full sets on piece of 8.5×11″ cardstock. Just be sure to keep a little space between them to make it easy to die cut.
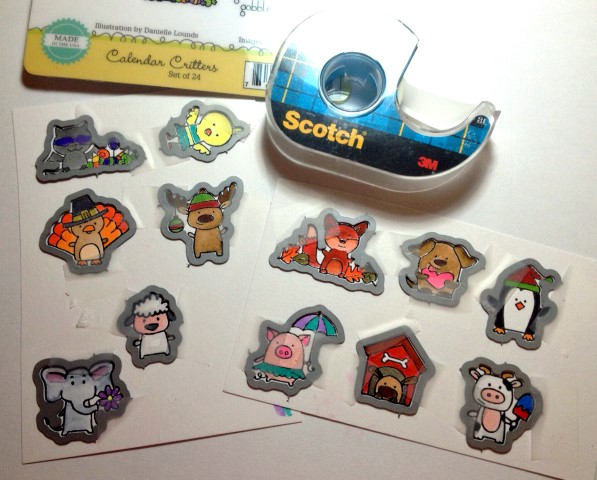
When you are ready to die cut, tape all your dies on with Scotch removable tape and cut them into 2 panels that will fit through your die cut machine. Easy Peasy! Afterwards you can keep the dies taped to the left over cardstock to make it easy to find the ones you need. And if you’ve stamped multiple sheets of images from the same block arrangement, the dies will be in the correct order for you too!
I’m sure you know someone who would appreciate a calendar set or a very simple set of notecards. I’m dying to know what you think of these stamps and dies!? Do you love them as much as I do? I’ve even planned my next class around them!
You’ll want to be sure to head over to the TE Blog for the full list of designers in the hop today! These products will be available in the TE webstore on Thursday morning, November 5th. Thanks for stopping by and for getting through my really long post today!
Taylored Expressions November Sneak Peeks – Watercolor Panels
November 3rd, 2015
This is Day 2 of the Taylored Expressions November Sneak Peeks. Everything being shown this week will be available in the TE webstore on Thursday morning, November 5th. Today I have a couple of samples of the new Watercolor Panels – Uplifting. These pre-printed panels are so much fun to play with! I recently got some of the Zig Real Brush Watercolor Pens and these panels were the perfect way to try them out!
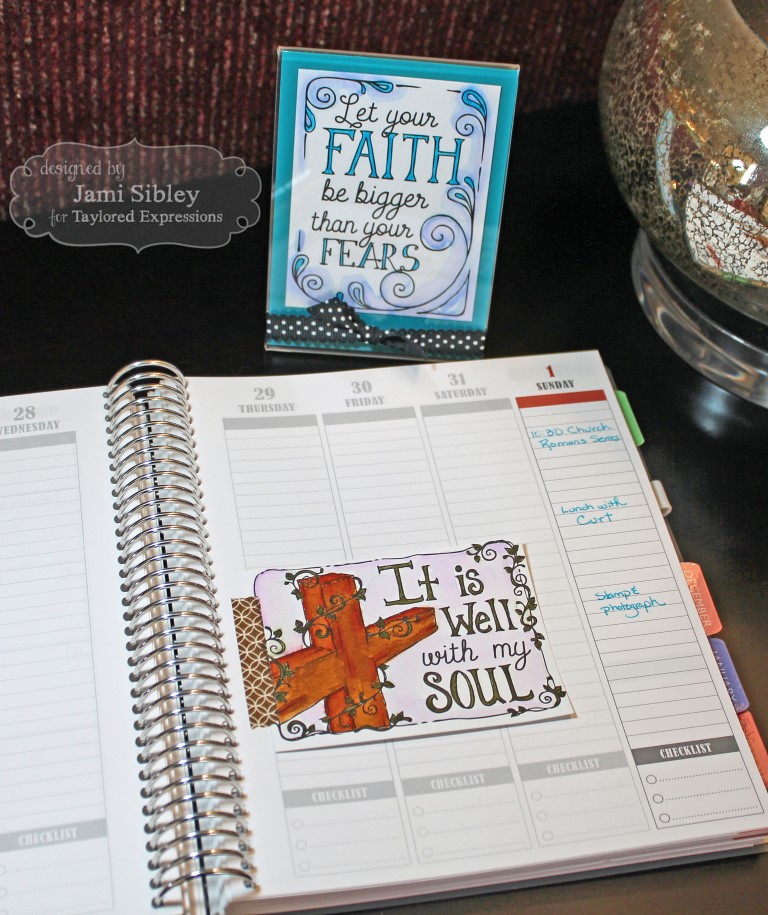
Not only are they fun to color, but there are tons of ways you can use them. Here, I put one in my planner. I just used some washi tape to hinge it in. The other one is in a 3.5×5″ acrylic frame that can sit on my desk.

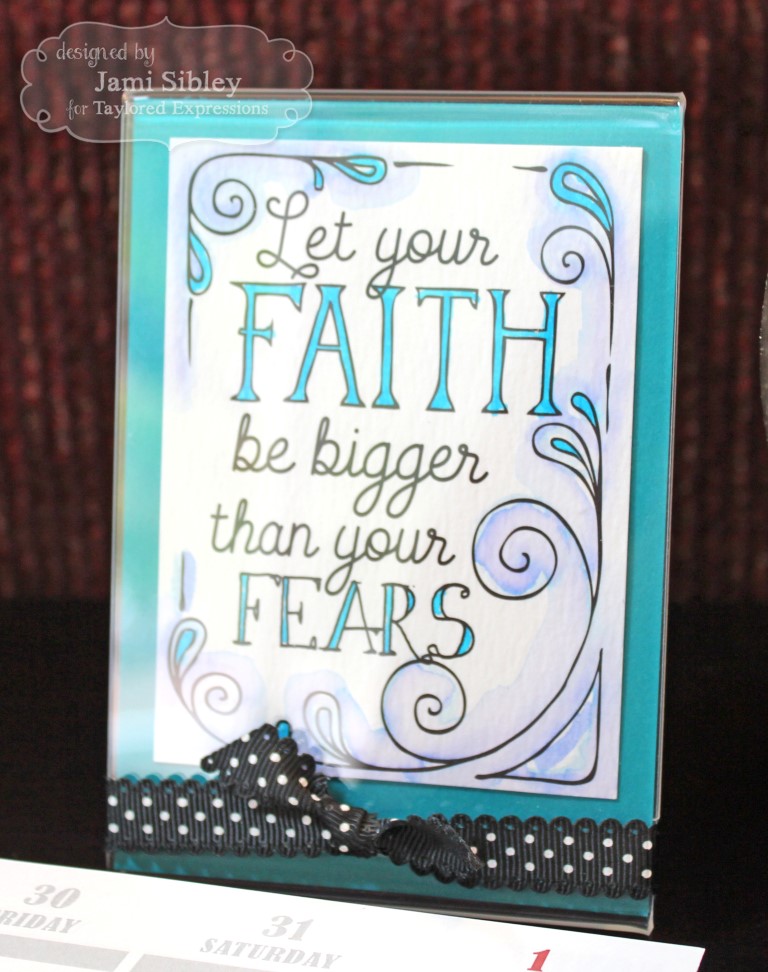
This pack of panels is loaded with wonderful reminders to point us to our Savior in all things! There are also several panels with just border artwork so you can add your own journaling or stamped sentiment. These panels would work well on card fronts, as tags, in Bible journaling, as framed art, in pocket scrapbooking, to decorate prayer journals and other notebooks, and more. What would you use them for?
Thanks so much for stopping by today. You’ll want to head over to the TE Blog to get the link list and see what the Creative Team has cooked up today as well as to find out how you can enter to win prizes this week!
Be sure to come back tomorrow. I have a bunch of samples to share!
Taylored Expressions Release Day
September 3rd, 2015
Happy Thursday! It’s Release Day at Taylored Expressions! All the products that have been peeked this week are now available in the TE Webstore! I have quite a variety of samples to share with you today. As I mentioned on Monday, once I got started playing with this stuff, I just couldn’t stop. And really, I’ve only touched the tip of the ice berg with this incredibly fun release! I hope you’ll head over to the TE Blog (once you’ve finished my post, of course!) and see all the new products and go on the hop with the whole Creative Team! SO.MUCH.TO.SEE!!!

My first sample above is a simple sympathy card featuring the new On the Prairie Embossing Folder. I used some Prismacolor pencils to do just a little bit of coloring and then the whole panel was spritzed with Sheer Shimmer Spritz – Sparkle. Of course, you can’t see it in the photo, but it gives the card a beautiful subtle shimmer.
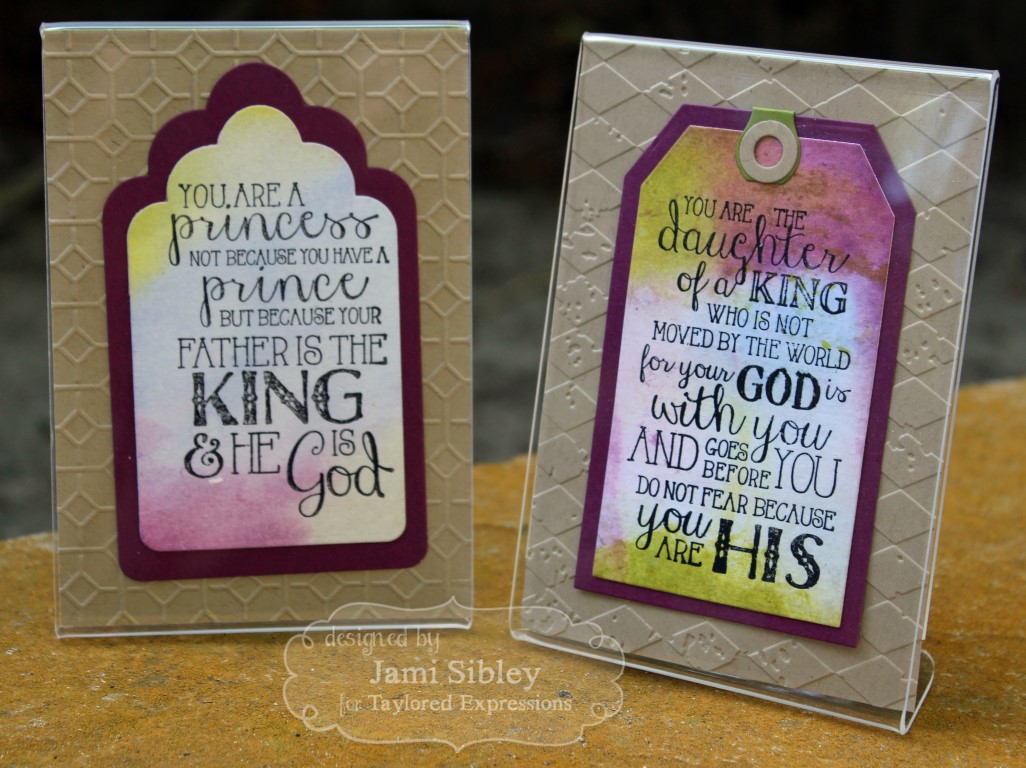
Next up is a pair of little art pieces I made for the girls who work with me in the church office. These are 3.5″ x 5″ acrylic stand up frames – perfect for little desk decor. Of course I used colors to match our office. I used watercolor paper for both of them and embossed these awesome new A la Carte sentiments – He is God and Daughter of the King with black pigment ink and clear powder.

For the first one above, I went for subtle color by painting on the Distress inks with a waterbrush onto very wet watercolor paper. The one below is more bold. I used the smoosh technique. I rubbed the ink from the little Distress cubes onto a large acrylic block and then smooshed that onto the damp watercolor paper.
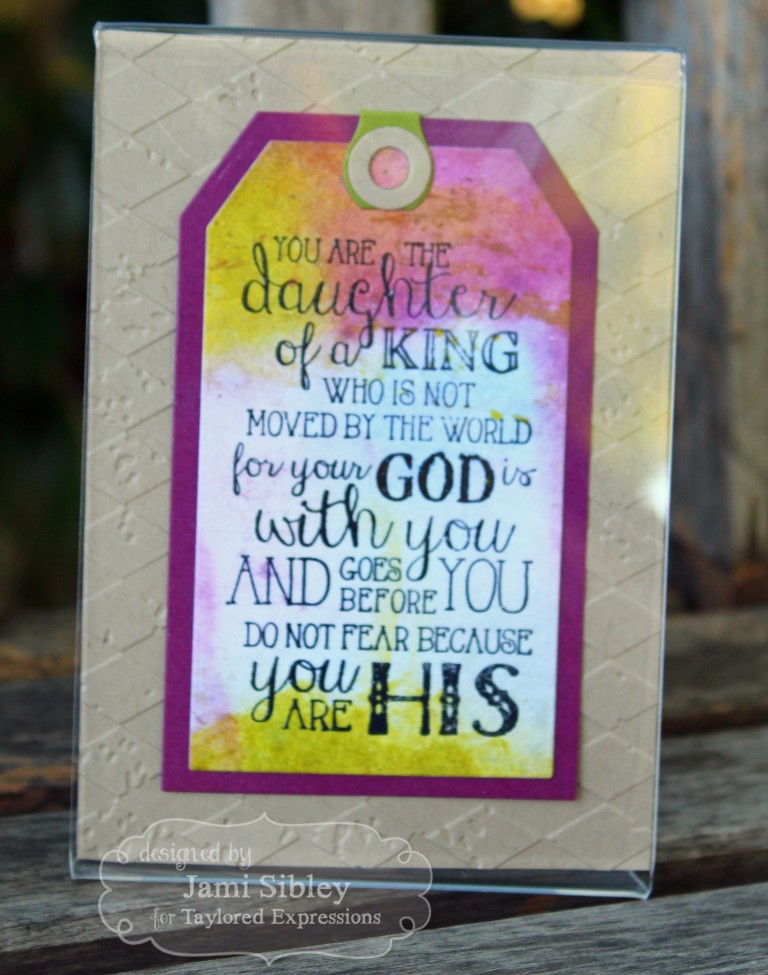
Nothing is ever quite perfect. Oops – I realized after this was all put together that I forgot to punch the hole out at the top of the tag. LOL! Oh well! My last sample for the week is below and it’s one of my favorites! I love this adorable Petite set, Pixie Dust, with the princess illustrated by Danielle Lounds. I used two of the new Little Bits dies with the previously released Color Block Cutting Plate. This was such a fun card to create!

Thanks so much for stopping by. I haven’t blogged this much in a week in a very long time! I do hope you’ll take some time to check out the whole hop today – click over to the TE Blog for the hop list – and maybe treat yourself to some shopping at Taylored Expressions! If you have a minute, please let me know what your favorite product is from this new release!
Supplies
Sympathy
On the Prairie Embossing Folder, Care & Comfort II Stamp Set, Prismacolor Pencils, Sheer Shimmer Spritz – Sparkle
Royal Treatment
Stamps: Pixie Dust
Dies:Color Block Cutting Plate, Little Bits – Carriage and Crown
paper: Hellow Happiness Matched Kit
Other: Wink of Stella Gold Brush Pen, Copics, foam tape
Desk Sign – Daughter
Stamps: Daughter of the King
Dies: Tag Stacklets 2, Tag Reinforcements
Embossing Folder – Harlequin
Tag Background created with Distress inks smooshed onto watercolor paper. Sentiment was stamped in black pigment ink and heat embossed with clear powder. Tag was spritzed with Sheer Shimmer Spritz – Sparkle
Desk Sign – Princess
Stamps: He Is God
Dies: Tag Stacklets 1
Tag Background created with Distress inks watercolor with a water bruch onto watercolor paper. Sentiment was stamped in black pigment ink and heat embossed with clear powder. Tag was spritzed with Sheer Shimmer Spritz – Sparkle


