Taylored Expressions Release Day – Celebrating 9 Years!
September 7th, 2017
It’s Release Day at Taylored Expressions! I hope you’ve been enjoying the birthday party all week long celebrating TE’s 9th Birthday! My original intention for today’s post was to create a birthday card (sooo many new birthday-themed products being released today) to say Happy Birthday to TE. But I had a pretty specific idea stuck in my head – from before I ever received the products. I had to laugh because Taylor created the card and shared it on Monday – almost exactly as I had it pictured in my head. LOL! So I went an entirely different direction.
Instead, I’m featuring new products Autumn Leaves Background, Thanksgiving Blessings (set of 7 sentiments), and Little Bits die – Pumpkin Pie.
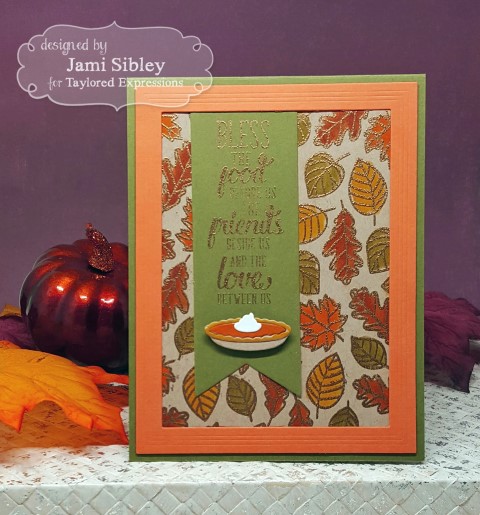
Isn’t that just the cutest little pie?? The leaves and sentiment were both heat embossed with gold powder. The sentiment looks awesome IRL, but I just couldn’t capture the shiny gold completely in a photo.
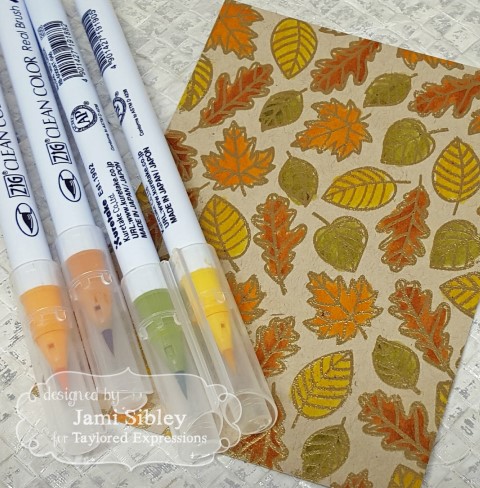
The Autumn Leaves Background was stamped in Versamark on Toffee cardstock and heat embossed with gold powder. Then I colored the leaves quickly with Zig Watercolor pens.
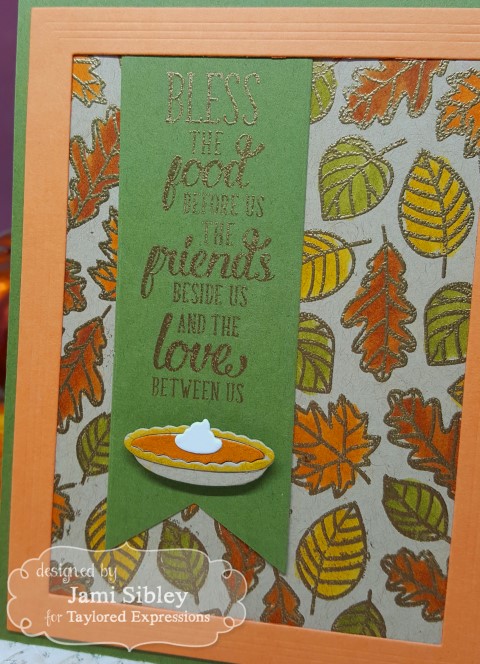
“Bless the food before us, the friends beside us, and the love between us”
These would be great invitations for Thanksgiving dinner or a thank you card for the hostess. While I chose to color in the leaves, if you wanted to make multiples, I think it would look great stamped tone on tone as well.
Thanks for stopping by. Feels great to create again!
See what the Creative Team has cooked up: TE Blog
Shop for new products: TE Webstore

Taylored Expressions 9th Birthday!
September 6th, 2017
Well, Hello there! I haven’t stamped or blogged in quite some time – several months. If I tried to relate all that has gone in these past few months, I’m pretty sure you’re head would be spinning. Suffice it to say, it’s been CRAZY. Nonetheless, there was no way I was going to miss the birthday festivities at Taylored Expressions – the NINTH BIRTHDAY! What??? I can hardly believe it!
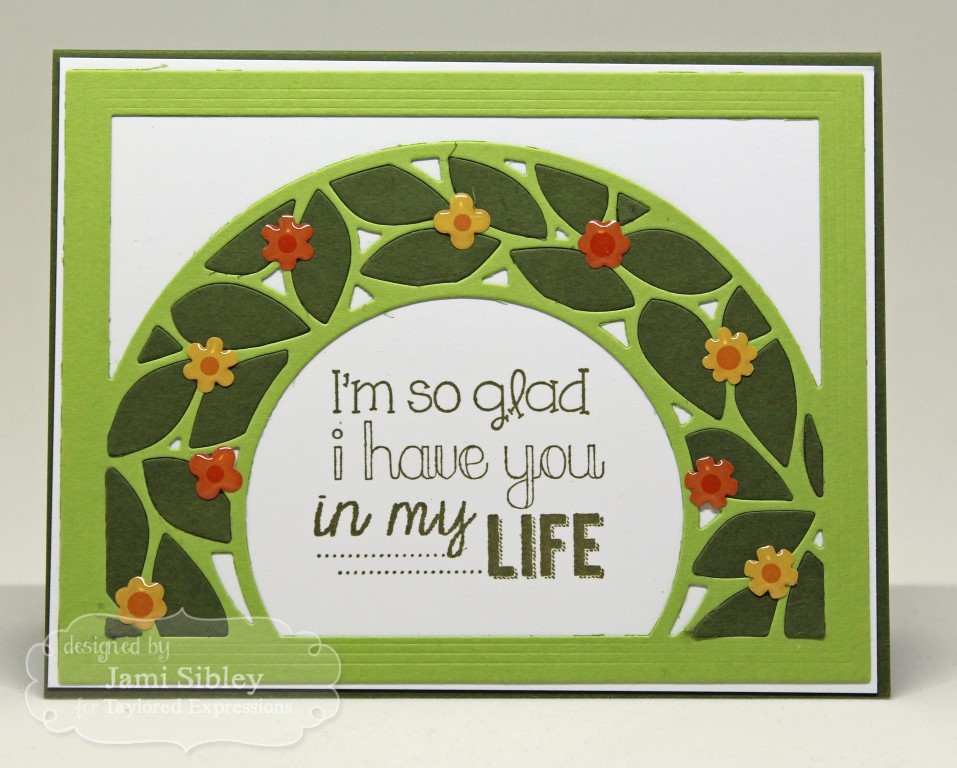
I’m happy and privileged to play along today and tomorrow with the TE Creative Team. There are so many wonderful stamps and dies being released tomorrow (Thursday, September 7th), that it was hard to decide where to begin. I always love making sets of cards, so I decided to start with one of my very favorite sets of the release – the sweet and simple Laurels. I created a set of four cards.

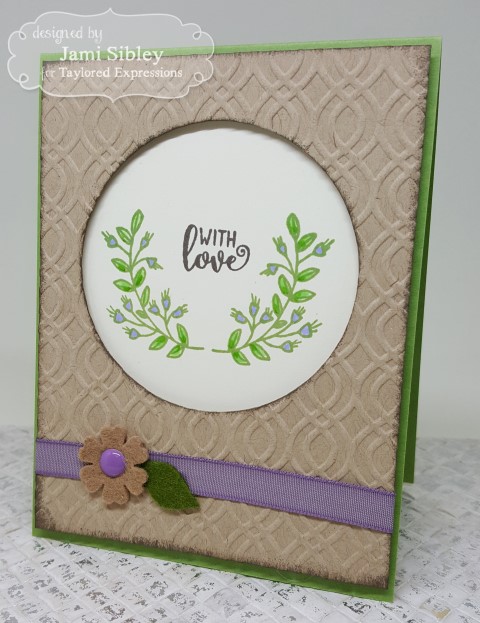
I decided I wanted to use TE Peapod cardstock along with Toffee (looks a little purple in this photo – sorry – it’s totally kraft/toffee) and creamy Buttercream. I also used the new Mocha ink along with some Peapod ink. Stitched Circles TE Dies in two sizes were used to cut the circles and I chose two embossing folders: Garden Party and Braided. I played with several different embellishments with some vintage trim and ribbon from my stash along with die cutting leaves and a flower from felt.
Here are individual photos (where the color is a little more true):

For this one, I stamped on a piece of buttercream attached to the card front and popped the embossed layer with the circle window up on foam tape.
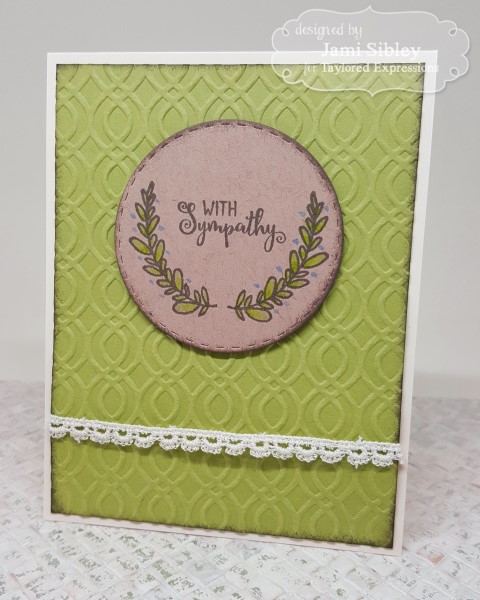
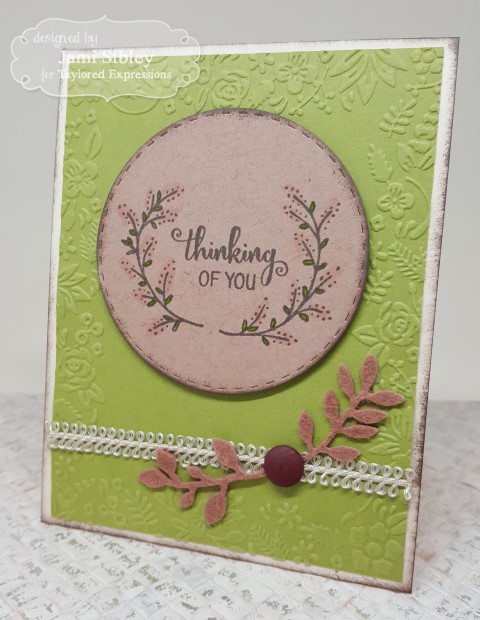
Here I used the stitched circle that was cut out of the panel in the card above to stamp my Laurels on. The circle is popped up on foam tape. I prefer to keep sympathy cards super simple, so I just added a little trim and nothing more.
A little color was added to the stamped images with Zig Watercolor pens. The flower embellishment was die cut from felt.
I was happy to use all four of the laurel images in the stamp set. There are a total of seven sentiments, so you have a great variety for almost any occasion! These cards could be done super quickly with this minimal amount of coloring. They could also be done easily with no coloring – just picture them embossed in gold or copper! I just love this set. If you are considering making card sets for Christmas gifts, I would highly recommend this stamp set!
Thanks so much for stopping by. Be sure to see everything the team has to offer by following the links posted on the Taylored Expressions Blog. I’ll be back tomorrow with a yummy autumn card!
Taylored Expressions March Release – All About Home!
March 9th, 2017
It’s Release Day at Taylored Expressions! Hopefully you’ve been following along with all the amazing project peeks this week and are ready to shop! There’s lots more to see today too with all the players linked over at the TE Blog. I have a fun card to share today. These products came at a perfect time for me, as my BFF (who lives in another state) just moved into a brand-spanking-new house and I was dying to send her a congrats gift and card! She’s someone who notices details and truly appreciates a beautifully wrapped package, so I started by trying to coordinate colors with a new roll of wrapping paper.
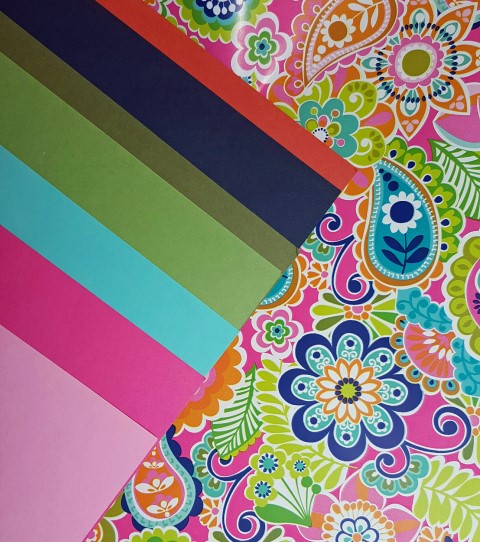
I am obsessed with this wrapping paper! And look at how perfectly these TE cardstock colors work with it! Based on this, here’s the card I created.

I stamped the neighborhood border stamp from There’s No Place Like Home, omitting a small portion of it, and then sponged some green ink underneath that. I die cut the Little Bits Cottage as the highlighted new home. The texture created by the new Subway Tile Embossing folder was just the perfect touch in the background.
Inside:
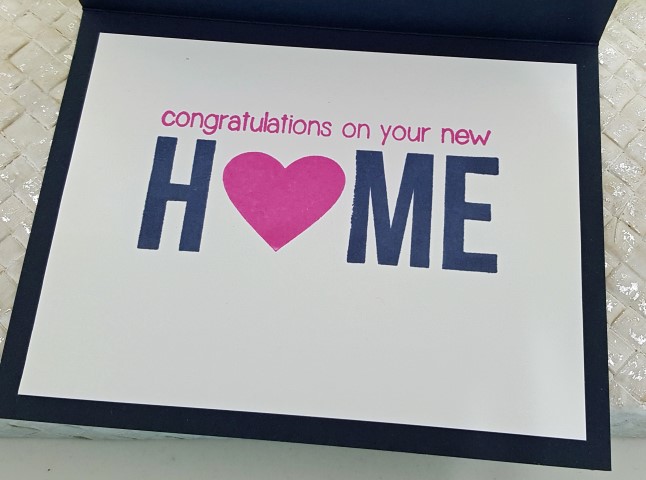
Simple stamping of the very large sentiment combo! I was super happy with how this turned out and very excited to get it out in the mail!
Thanks for stopping by! Happy hopping and happy shopping!
Taylored Expressions March Sneak Peeks – Three Dimensional
March 8th, 2017
It’s Day 3 of the Taylored Expressions March Sneak Peeks. Everything will be available in the TE Webstore tomorrow morning. I’m jumping in with a couple of very fun 3-D items.
First up is a super sweet little house created with the Taylored Die Home Sweet Home.
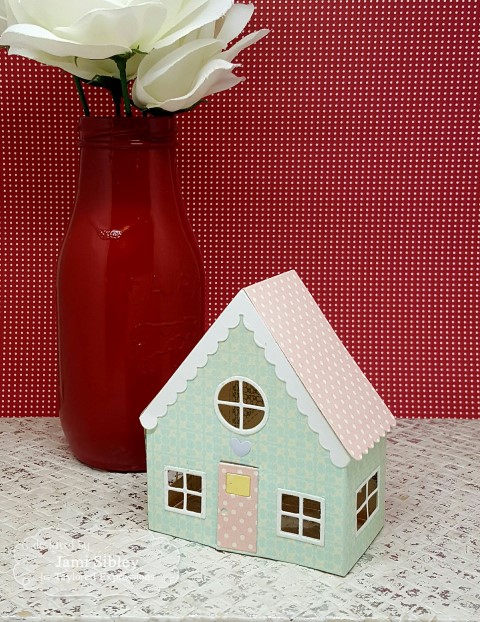
ACK! How cute is that? I literally just grabbed the first patterned papers I could get my hands on, so I could play with this adorable die. I kept it super-duper simple for my first try, but there’s also an accessories set, so you can go crazy with customizing! The house has no bottom, so it would be perfect to set over a battery-operated tea light!
Next up is my favorite new product from this release the Taylored Die – Matchbox and the coordinating stamp set Matchy Matchy!
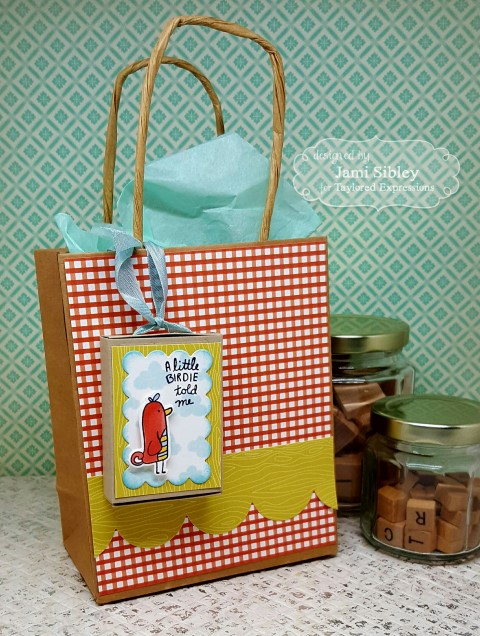
When this concept was in development, I just kept picturing this cute little matchbox as a tag/card on a gift bag. I couldn’t wait to make that vision come to life!
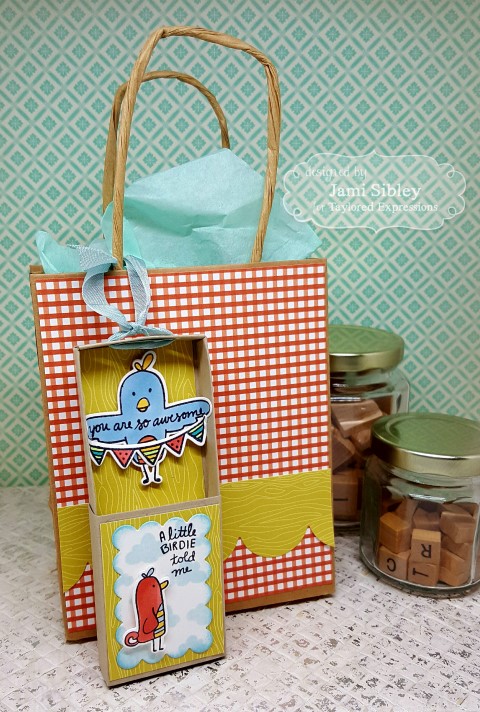
Look! The bird’s wings were designed to fold up inside the tray of the matchbox! And there are multiple sentiments that will fit across the wings too! This little stamp set packs a punch with images and sentiments for birthdays, love, and encouragement, plus I managed to use it for a Thank You Gift! I wrote my personal message on the back of the matchbox. The patterned papers used on the bag and the matchbox are from the TE 6×6 Paper Pack – Playful Patterns Harvest. Don’t get too caught up in thinking certain paper packs are only for specific seasons.
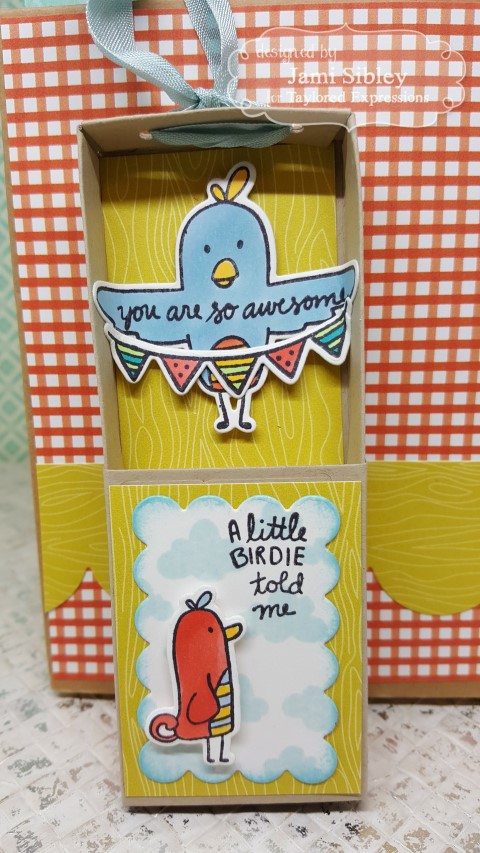
See those tiny clouds? That’s another stamp set – Matchy Backgrounds – sized just perfectly for these matchboxes and other tiny scenes! The possibilities for these little matchboxes are almost endless and I think I can safely say that we will definitely have more coordinating stamp sets to come!
Be sure to check out all the other peeks offered by the TE Creative Team. All the links are on the TE Blog!
Taylored Expressions February Release – Healing Prayers
February 9th, 2017
Wow – it has been a loooong time since I’ve blogged. Hoping to get a tour/reveal of my updated stamp studio photographed and posted soon, but in the meantime I’m very happy to play along with the TE Release and the Creative Team this month. There are so many great products in this release! I think my favorites might be the You’re in My Prayers and the So Very Blessed stamp sets along with the coordinating Prayers Script and Blessed Script dies. I can really see myself making LOTS of cards with these! And here is my first one!
 Products used:
Bloomin’ Background
You’re in My Prayers
Prayers Script Die
Skinny Mini Spring Borders
TE Enamel Dots – Sugar Cube
Taylored Expressions Premium Dye Ink in Peapod, Sprinkles, Cookie Monster, Lavender Glaze, Strawberry Milkshake
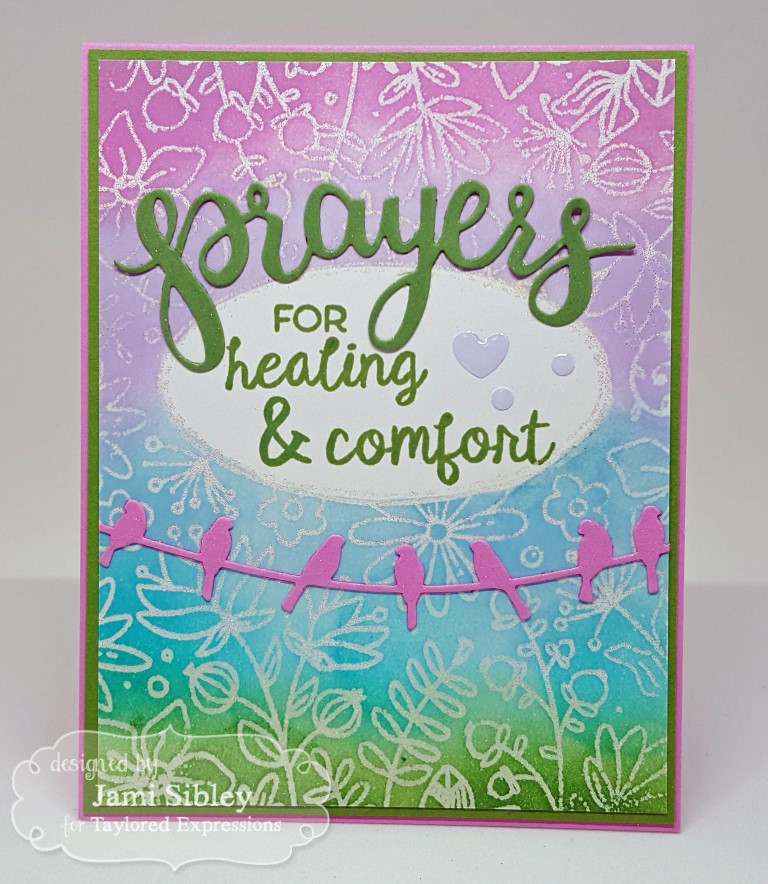
This card is super sparkly in person. I started with a shimmery white cardstock and stamped the background stamp with Versamark and heat embossed with a sparkly kaleidoscope embossing powder. I masked off the oval portion of the image and sponged on the TE inks listed above.
I used a Stamp-a-majig (yep, I’m old fashioned like that) to line up the words I wanted to use for this sentiment (there are several options for different combos in the stamp set). Then I adhered the die cut word “prayers” and the line of birds (cut from the new Skinny Mini Border die set). I wanted even more sparkle so I painted both die cuts with a Wink of Stella pen. One last finishing touch with a few of the brand new TE Enamel Dots. This Bloomin’ Background is another favorite from this release. Did you see it earlier this week and some of the amazing coloring the girls on the team showed? Seriously WOW!
This card is being sent off in the mail today to a sweet friend in the midst of a battle.
Thanks for stopping by today. Be sure to head over to the TE Blog for links to all the girls in the hop today and then get over to the TE Webstore and shop, shop, shop!
Taylored Expressions Holiday Release – It’s here!
October 6th, 2016
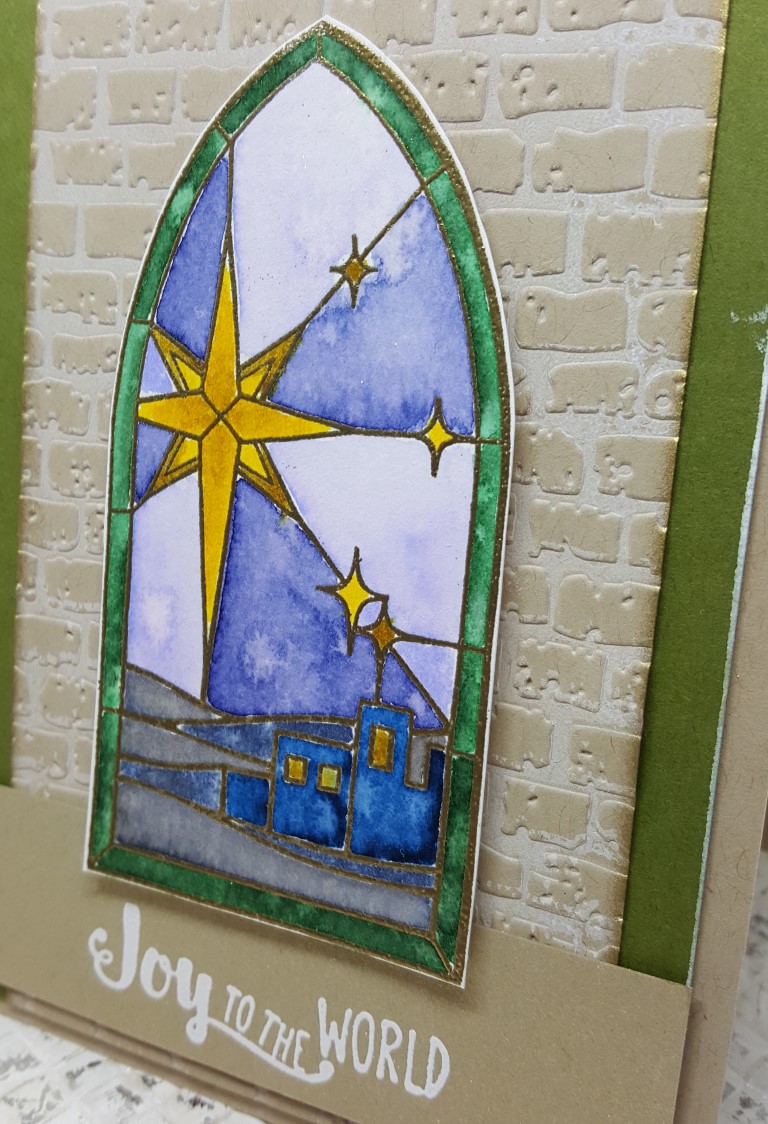
Happy Thursday! It’s release day at Taylored Expressions, so all the incredible holiday goodies are now available! I have one more quick card to share that was created with the beautiful new stamp set O Holy Night! This set includes two gorgeous stained glass windows and several sentiments.
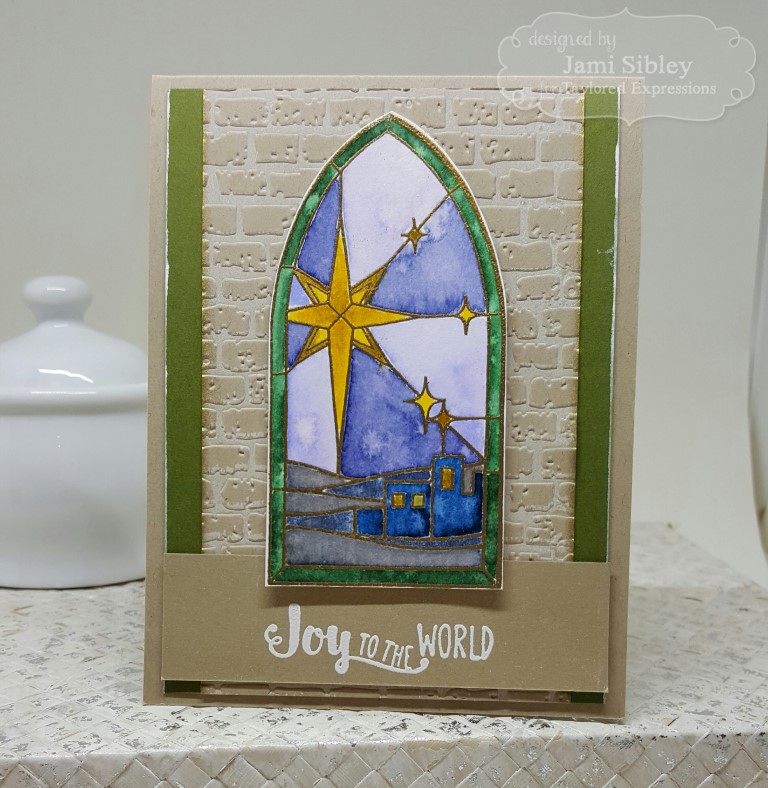
I heat embossed the window image with Versamark and gold embossing powder onto watercolor cardstock. Then I watercolored using Zig Real Color markers. The TE Brick Embossing Folder (which was inked with white ink before embossing the Toffee cs) gives some simple texture. The sentiment was heat embossed with white ink and white powder. I used gold ink and white ink to edge the panels and then decided to keep the card design very simple without embellishment.
Be sure to hop over to the TE Blog for all the links to designers showing amazing samples today. Then head on over to the TE Webstore! How can you resist?
Thanks for stopping by!
Taylored Expressions October Sneak Peeks – Lots and Lots of Wreaths!
October 4th, 2016
Hey everybody! I’m excited (as always) to play along with the Taylored Expressions Sneak Peeks this weeks. The Christmas release is always my favorite, and while there are a myriad of awesome new products, I got totally stuck on just one! The first thing I started to play with right out of the box was the new Wreath Cutting Plate and I seriously could not put it down. Seriously. As in…I have EIGHT cards to show you today! And it was really only a lack of time that stopped me from having even more! There are just so many things you can do with this cutting plate as you can go from super quick and simple to as fussy and detailed as you might like!
Plus this product is a TE Webstore Exclusive – meaning you can’t buy it anywhere else. And TE is running a limited time promotion on it, where you can earn double points!
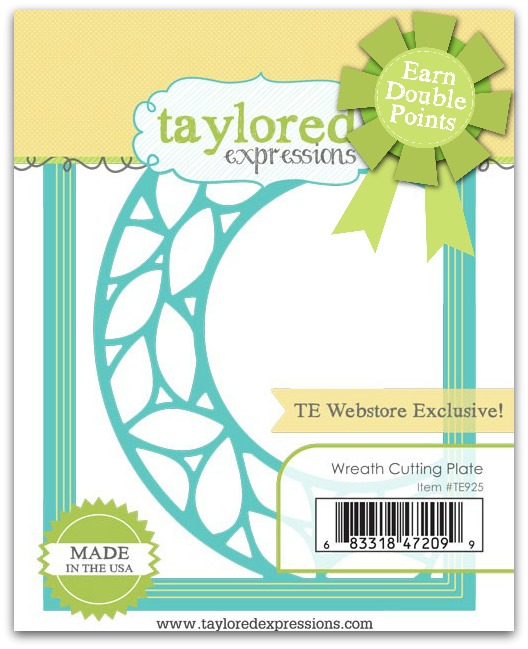
For a limited time, earn DOUBLE CRAFTY POINTS on our Wreath Cutting Plate! Not a Crafty Points member? It’s free and easy to join: Visit THIS PAGE and earn 48 Crafty Points on the purchase of this TE Web Store exclusive! Release Day is Thursday, October 6 at 7am PST!
Offer valid on qualifying purchases made between 7am PST on Thursday, October 6 and 11:59 pm CST on Sunday, October 9, 2016 only while supplies last. Only available to purchases made via our retail site www.tayloredexpressions.com.
Now, let’s get to the cards! The very first thing I wanted to do was to play with some watercolor smoosh backgrounds, so I created these:
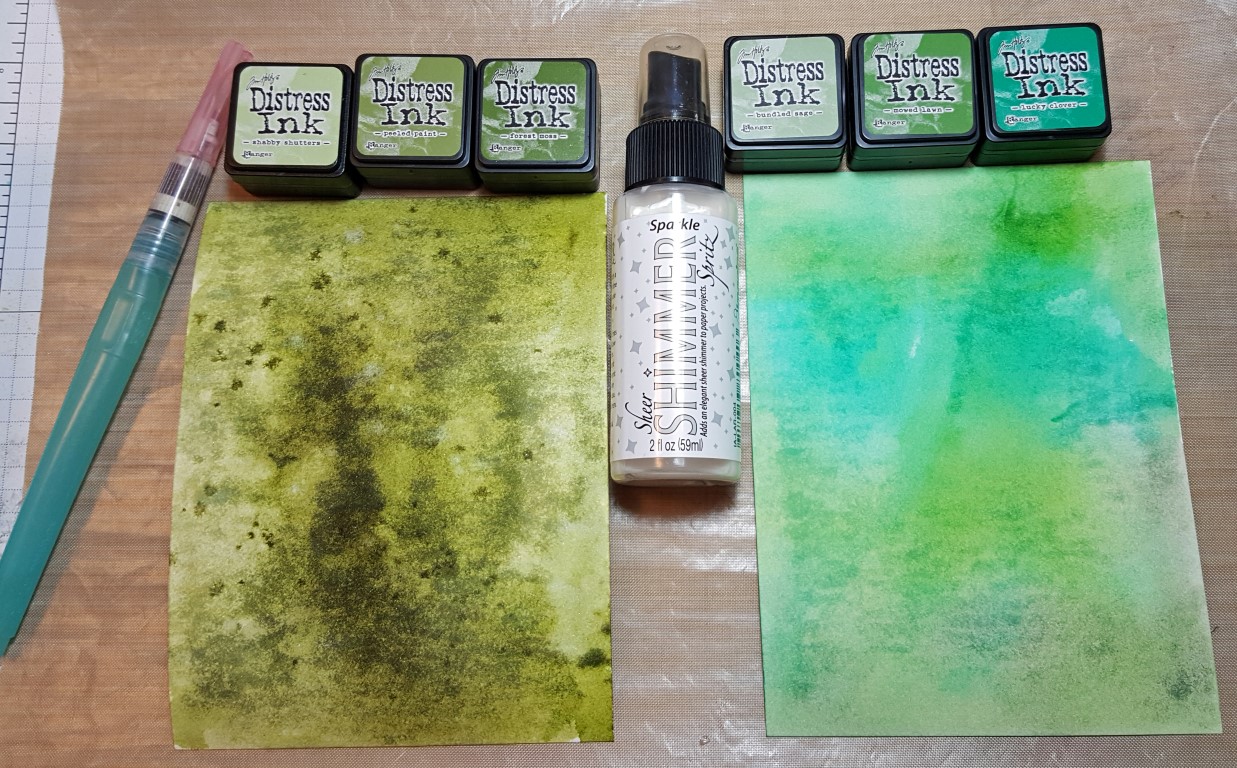
I used Tim Holtz watercolor panels and starting by spritzing them with a generous amount of water. Then I smooshed the Distress ink colors pictured on a large acrylic block and smooshed them onto the paper. I added more ink as needed and used a waterbrush to move and mix colors. On the darker panel I also sprayed a Sparkle Shimmer spray. I took those two panels and combined them to create these two cards:
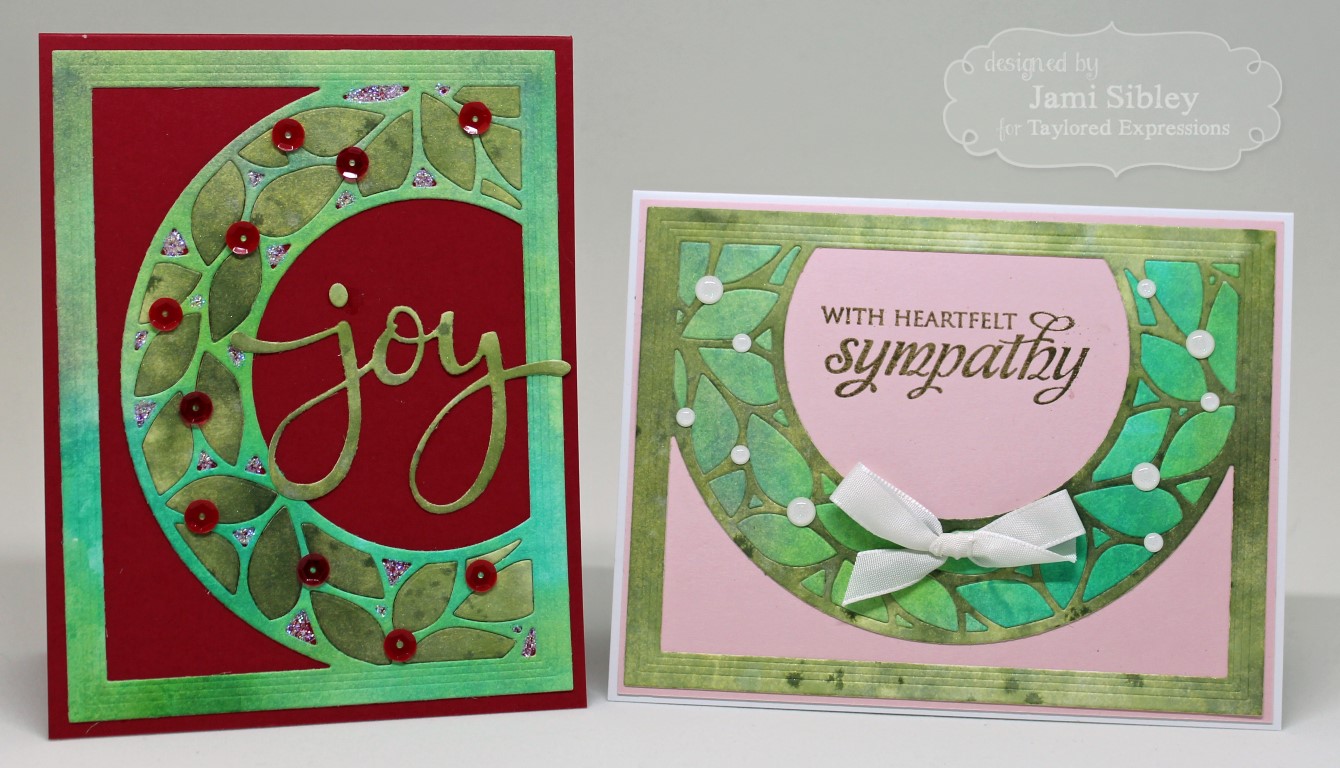
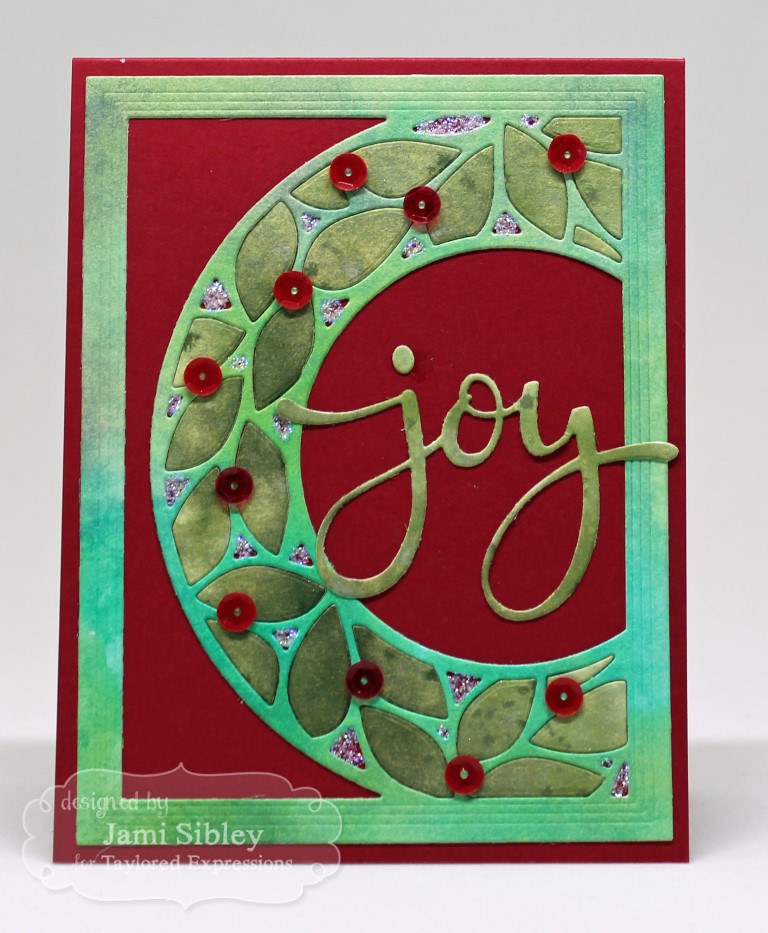
I inlaid the leaves cut from one panel into the other and visa versa. The “joy” is a new die – Joy Script. I added some stickles and some red sequins. Piecing in the leaves is a little fussy, but I actually enjoyed doing it.
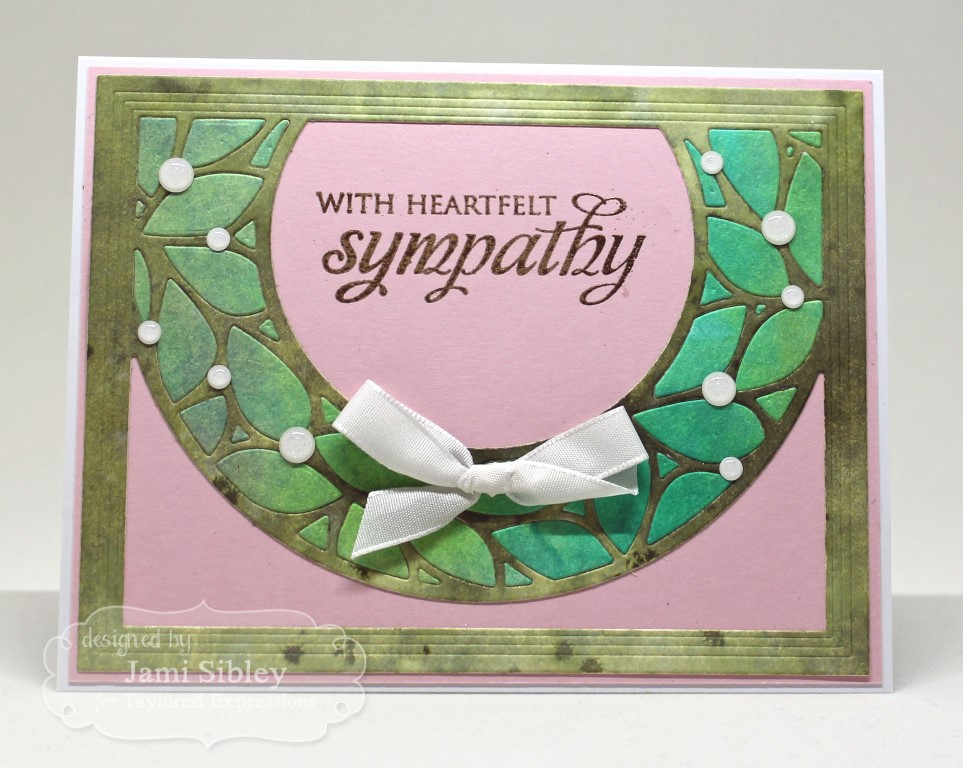
Next, I wanted to turn the wreath onto a horizontal card. I love that this wreath works in all four directions. Here I went with a soft pink for a sympathy card. The sentiment from Care & Comfort II was stamped with Versamark and heat embossed with gold embossing powder.
Here’s a trio of Christmas cards and these showcase a much simpler method.

For this card, I cut the plate from the striped patterned paper and simply attached it to a panel of the green polka dot paper. No need to piece in the leaves – they just show through the holes. Then I cut the plate from black cardstock and just adhered the two pieces you see here over the green polka dots. The whole thing was then adhered to a white card base. Sentiment is from the previously released In & Out Christmas. Easy peasy!

For this one, the plate was first cut from white cardstock. I was careful to keep the leaves in and adhered the whole thing to a red cardfront. I then colored the leaves with Copic markers. Sentiment is from another new stamp set, Ornamental.

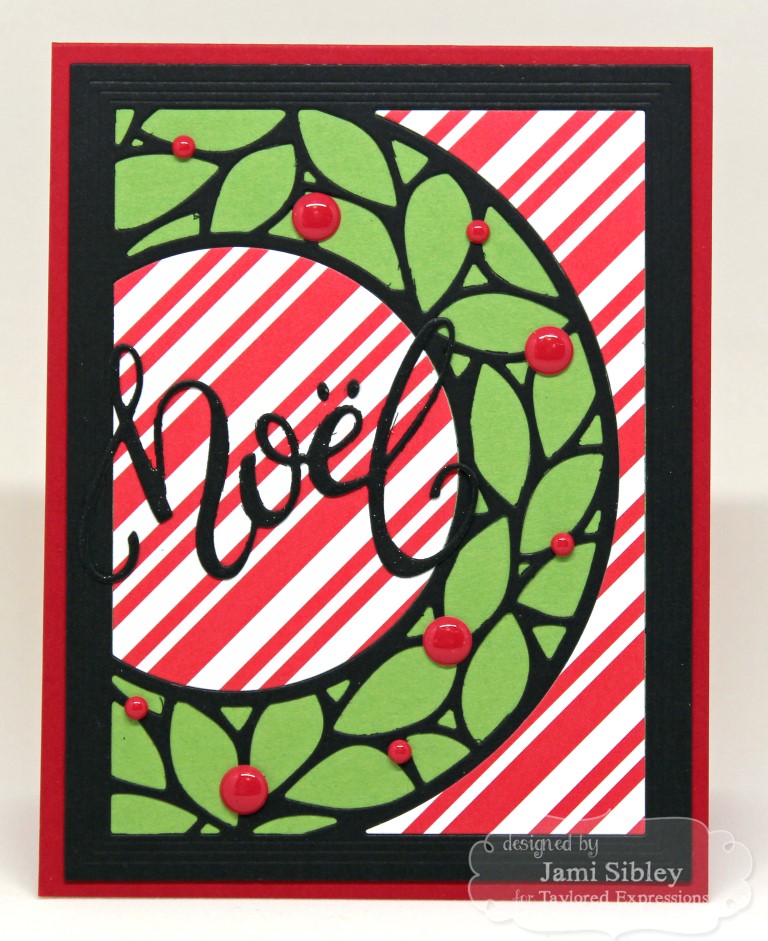
The third card in this group uses the striped pieces left over from the card above. The plate was cut from black cardstock and adhered over a green panel. Then those striped pieces, which I already had, were added. And actually, the black here and the black pieces in the card above are all from the same pass through with the die. Once you start with these, it’s kind of self-perpetuating! Ha! Again I have another new script die – Noel Script. Super super easy!
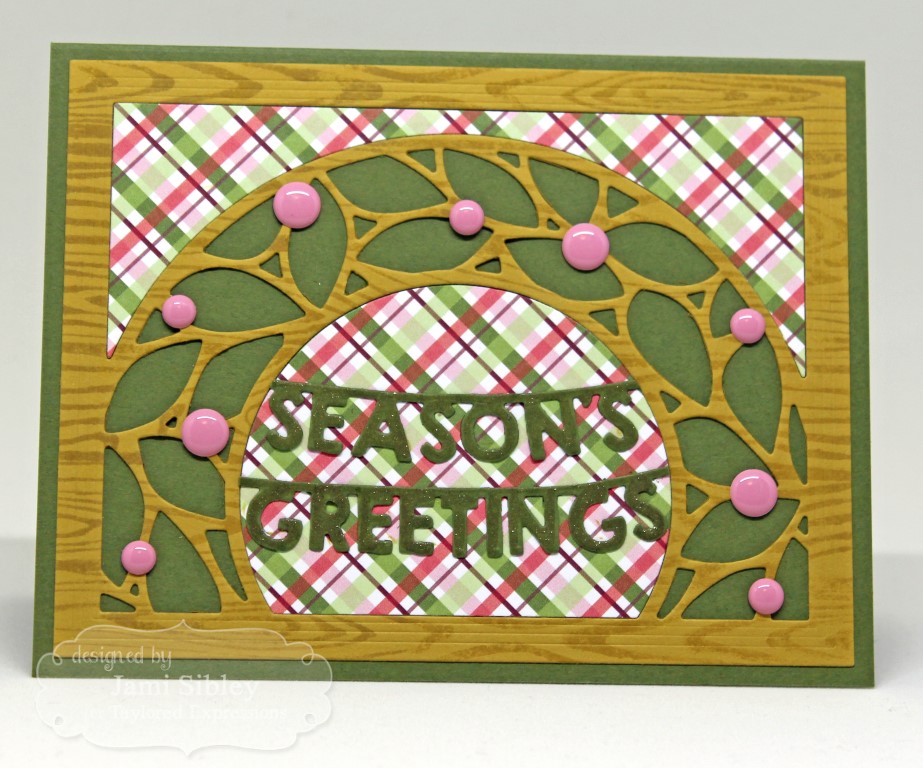
For this pair of cards, I wanted to play with the new Woodgrain background stamp.
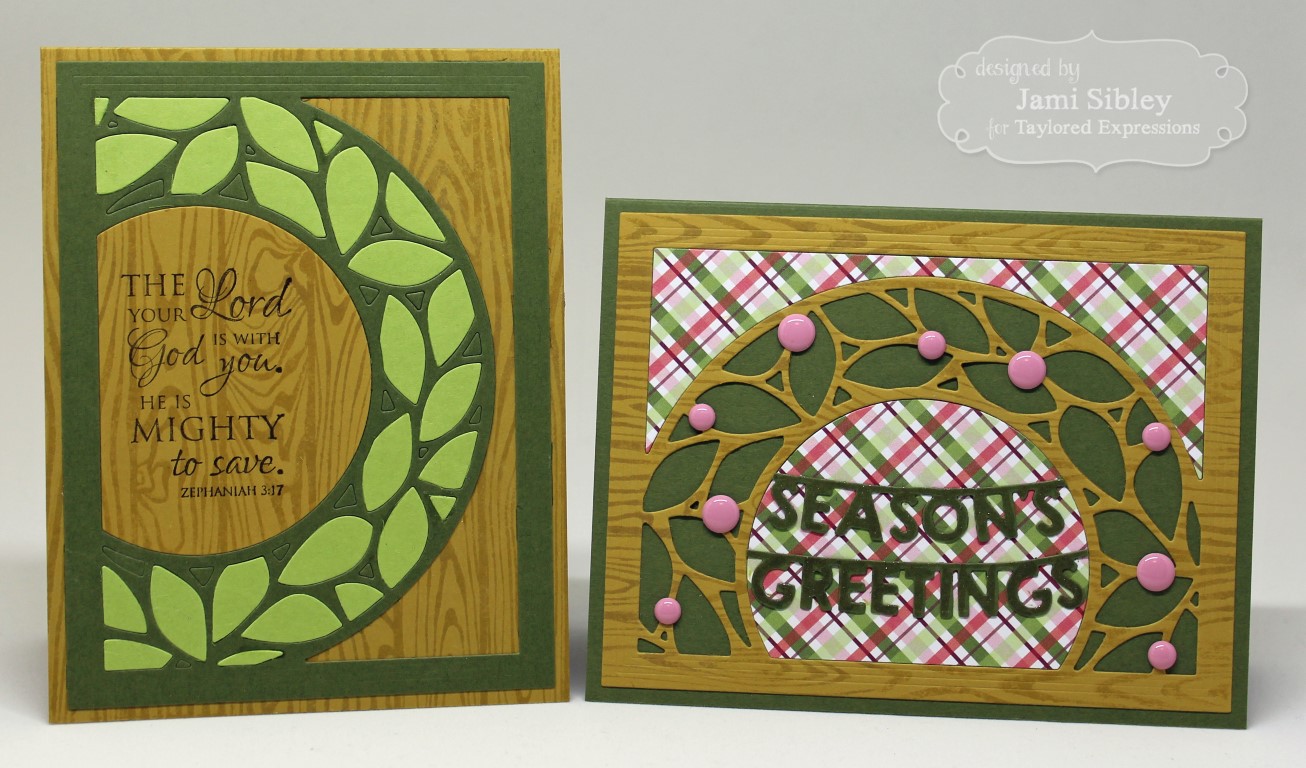
First a simple Christmas card using the Seasons’ Greetings Banner. Again, once the plate was cut from a piece of cs that had been stamped with the Woodgrain, the die cut piece was adhered directly to a cardfront.
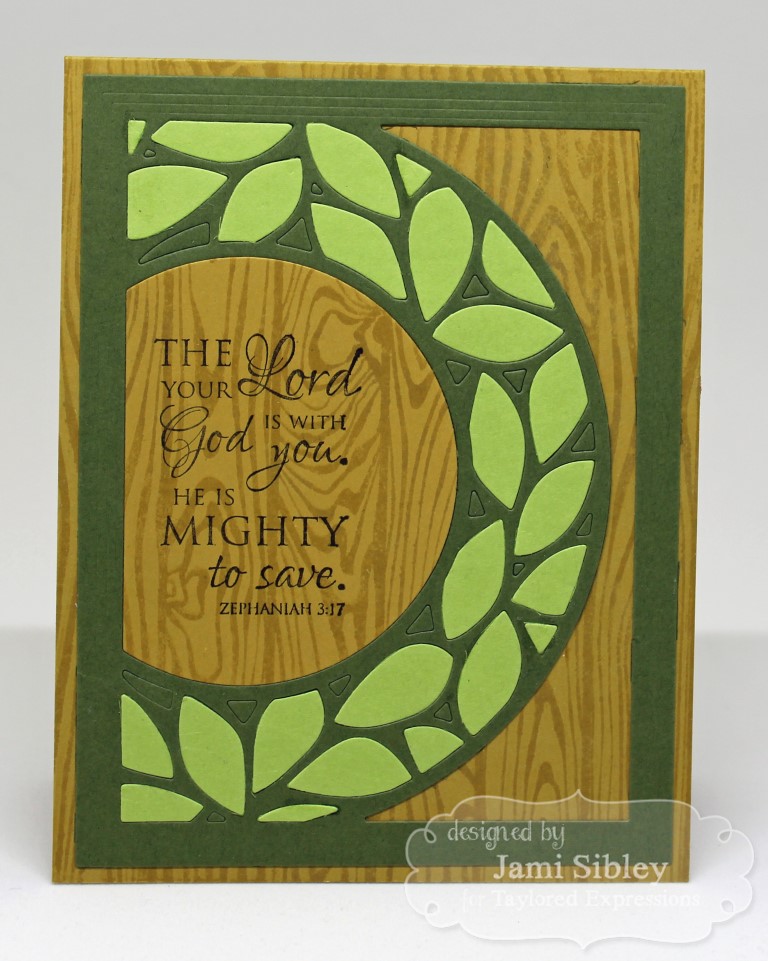
This rustic card features a sentiment from the stamp set In the Word. I actually did inlay the leaves on this one. The two greens pair up with the springtime card below. Told you…self perpetuating!
And finally this springtime card featuring a sentiment from Happy Heart might be my favorite!
All supplies used – cardstock. patterned paper, ink, embellishments, etc are found at Taylored Expressions.
There were so many cards to show that I didn’t want to get too detailed with my descriptions. If you have any questions, please feel free to post them in the comments. I hope you’ve seen the fun and versatility of this year-round cutting plate! Which card is your favorite?
Be sure to head over to the TE Blog for a list of designers with sneak peeks today as well as a chance to comment to win a prize! Thanks so much for stopping by!


