January Stamp Class
January 18th, 2012
Happy Wednesday! My monthly stamp class is coming up on Friday and I wanted to pop in and share one of the cards we’ll be creating in class. I have just a couple of spots still open and if you want to register you need to do so by tomorrow (Thursday) morning.
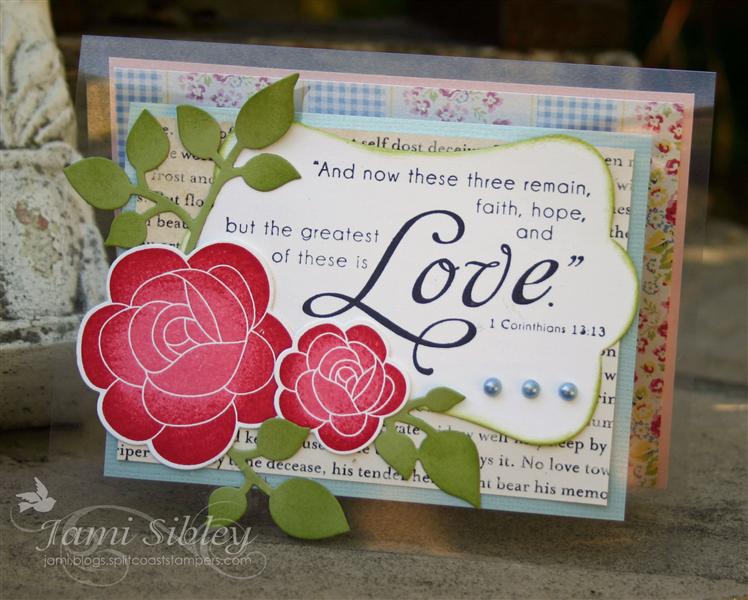
This card features TE stamp sets Rosy Posey and I Corinthinas A la Carte. I used Girls Paperie patterned papers (no longer available, but I still have a stash *grin*) and a clear card base. This card was largely inspired by cards presented by Baker’s Dozen members Wanda Guess and Melissa Sauls during TE January sneak peeks.
Here’s the inside.
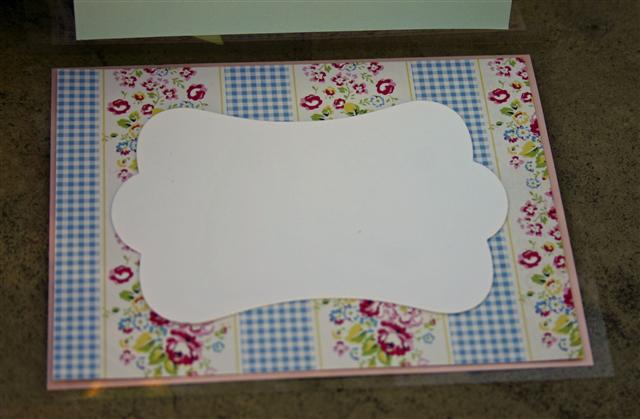
I left it blank because it could be used for so many different ocassions/purposes – Valentine, wedding, anniversary, friendship, etc.
I’m really tickled with how this turned out and I hope everyone enjoys making it on Friday.
If you’d like to join us, registration is $15 for 3 projects. Shoot me an e-mail right away. Thanks for stopping by!
![]()
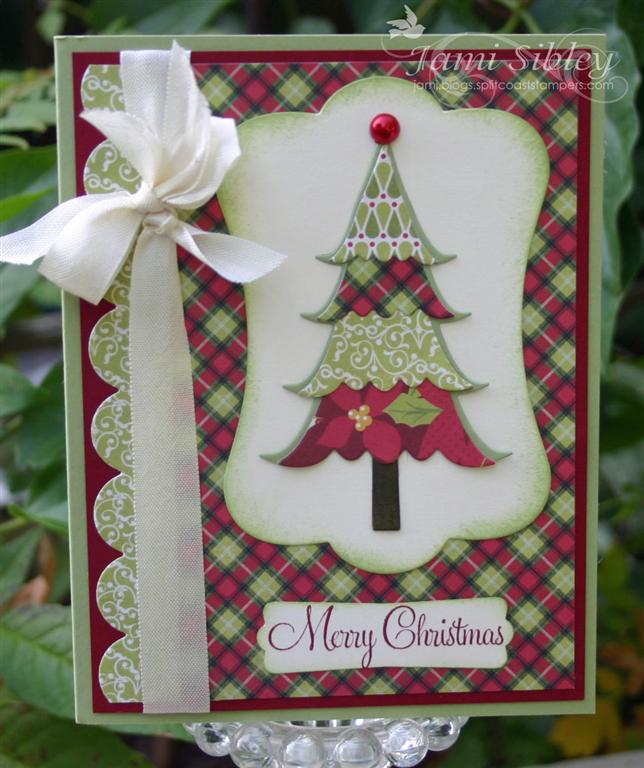
Three Trees
January 6th, 2012
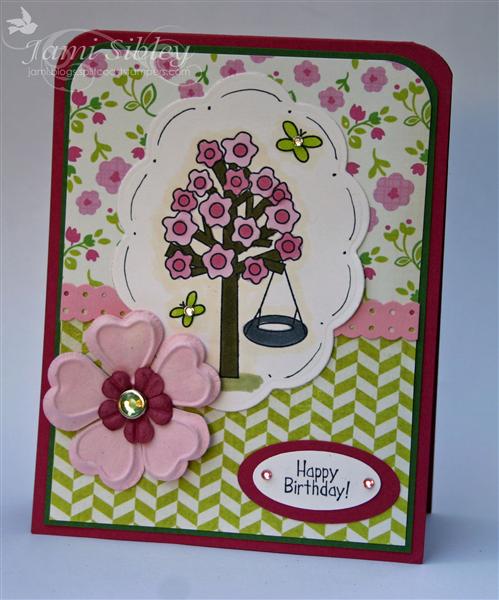
Happy Friday! I had so much fun this week playing along with the Baker’s Dozen for the Taylored Expressions January Release and it’s been a great start to my goal of blogging more regularly this year. Today I want to share 3 cards made with the same stamp set – Love Grows Here (illustrated by Emily Burger for the Embracing Grace line at TE.) These cards were samples for my November Class, but I never got around to posting them here.
This is the card we created in class –
I wanted to create some additional samples to give the girls some examples in case they wanted to use different tree images from the set. So here’s sample #2.

And here’s a third sample –
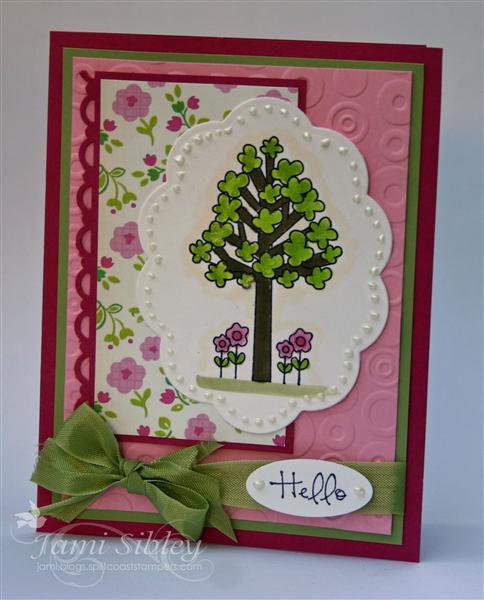
The cards are all just a little different using the Large Scallop Oval Spellbinders die with papers from Echo Park and The Girls Paperie. I just love this sweet stamp set. It has so many possibilities for cute and simple cards for tons of ocassions! I mentioned the other day that I love house images. Trees is another thing I can’t get enough of and these are just the perfect size!
Thanks for stopping by! I hope you have a wonderful weekend ahead!
![]()
Quick and Cute Christmas Bag
November 22nd, 2011
Happy Tuesday! Thank you to everyone who offered congratulations on our new family member through e-mail, Facebook and comments here on the blog. The pups are becoming better friends each day and we are enjoying them immensely. 🙂
Today I want to show you a quick and simple gift bag and tag that we created in my class last week. You’ll notice that the bag uses just a 2″ strip of patterned paper. This is a great way to use all those scraps you end up with from 6×6 pads when you cut 4″ pieces for cards.
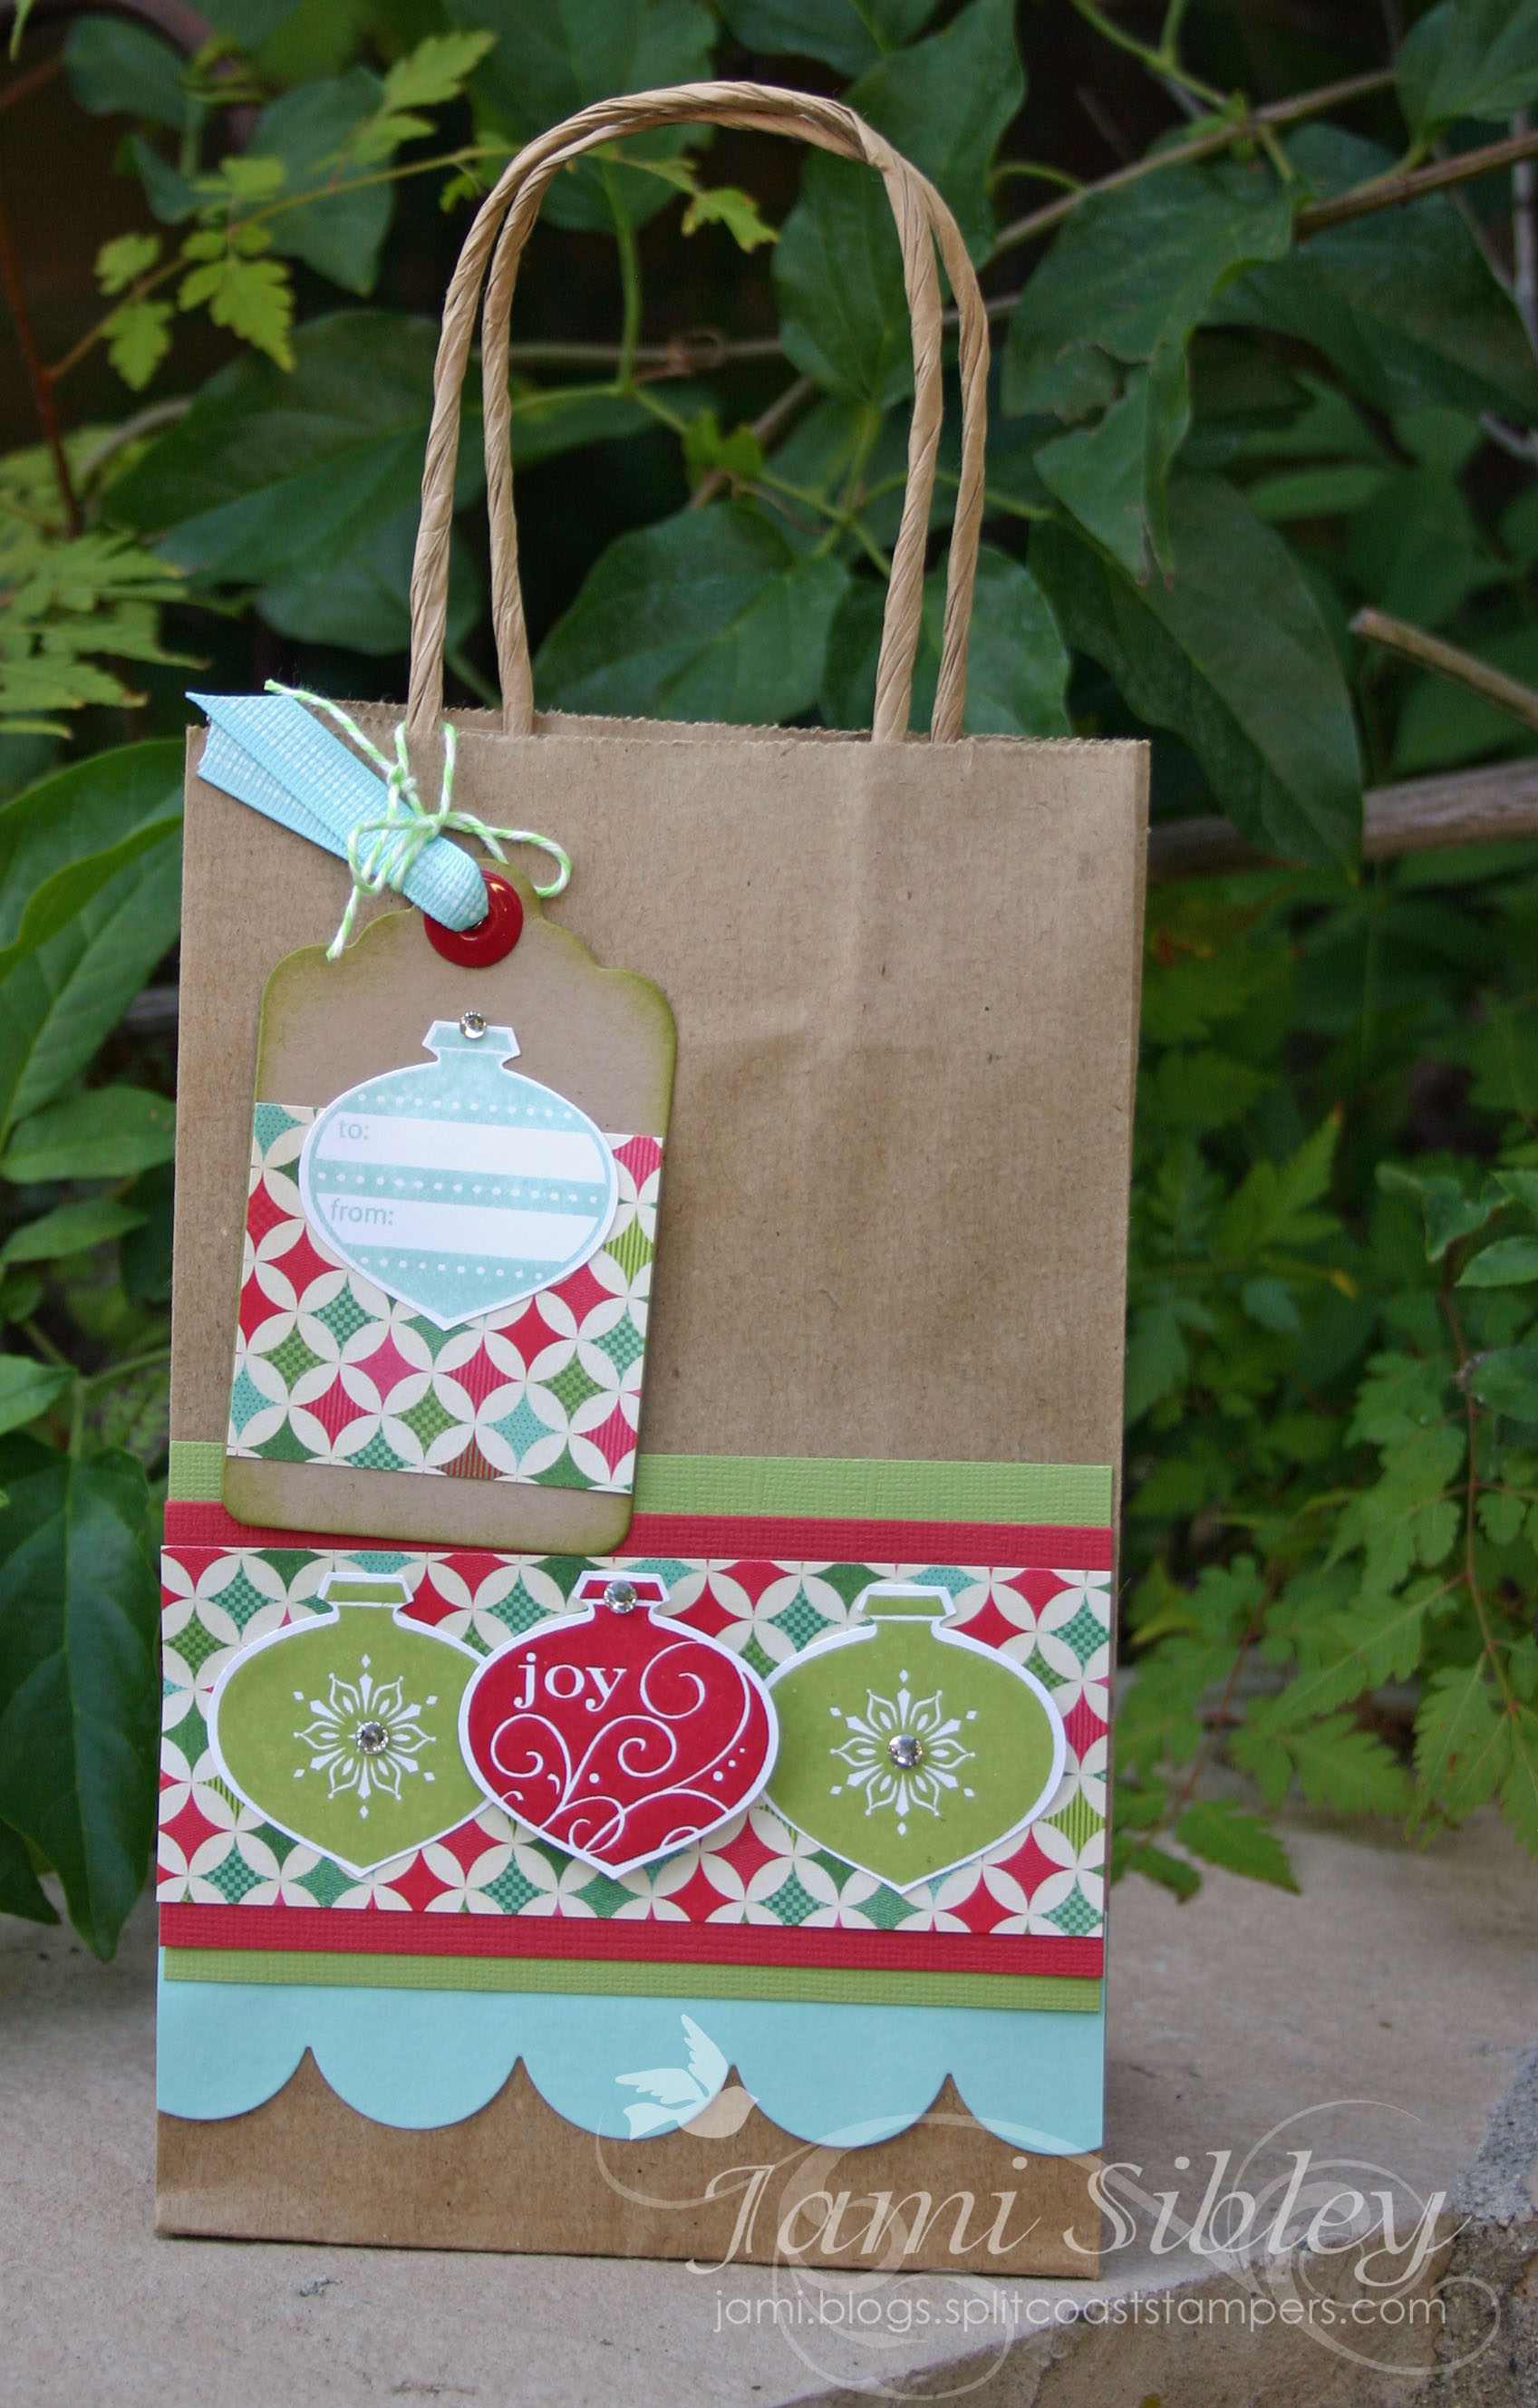
We started with a simple kraft gift bag. I purchased a package of a dozen at Joann’s. The papers, cardstocks and ribbon are from the TE 12 Days of Christmas Project Pantry. Since I was using a 6×6 pad, everyone in class got a different patterned paper. It was fun to see how all the different bags turned out. I wish I had taken a photo of them. Since the papers were all from the same collection we could all use the same colored cardstocks and inks. The stamp set is SU Delightful Decorations used with the coordinating punch. Ink colors are Lucky Limeade, Real Red and Pool Party. The middle ornament on the back is popped up on double thick (1/8″ as opposef to 1/16″) foam tape. Everyone got a kick out of the HUGE roll I had out on the table. Seriously – it’s the size of a pizza! LOL! The tags are die cuts that can be ordered in sets of 10 from the Favor Box Department at Taylored Expressions. There are tons of colors to choose from. The large eyelets are coming very soon to the TE Store.
These bags are so quick and easy to create! It would be great to have some made up and on hand, but they can also be done last minute just using the scraps from the last project left on your stamp table! Just be sure to have some plain gift bags on hand at all times. I like to have kraft and white in two sizes.
I’m off to work. I hope you have a fantastic day!
![]()
Stamp Class and Pup Update
November 18th, 2011
Happy Friday! Last night I taught my monthly stamp class and we had a blast as always! I know I always say this, but I am blessed with just THE BEST group of stampers. We had a newbie last night and I hope she had as much fun as the rest of us! It’s always great to introduce someone to stamping! We created three projects last night and I’ll be sharing one of them with you today.
This card utilizes the current Taylored Expressions Sketch Challenge – TESC150 along with the TE stamp set Thankful. There were actually 3 different versions of this card each using a different Fall-colored patterned paper collection. The paper on my sample is from SU.
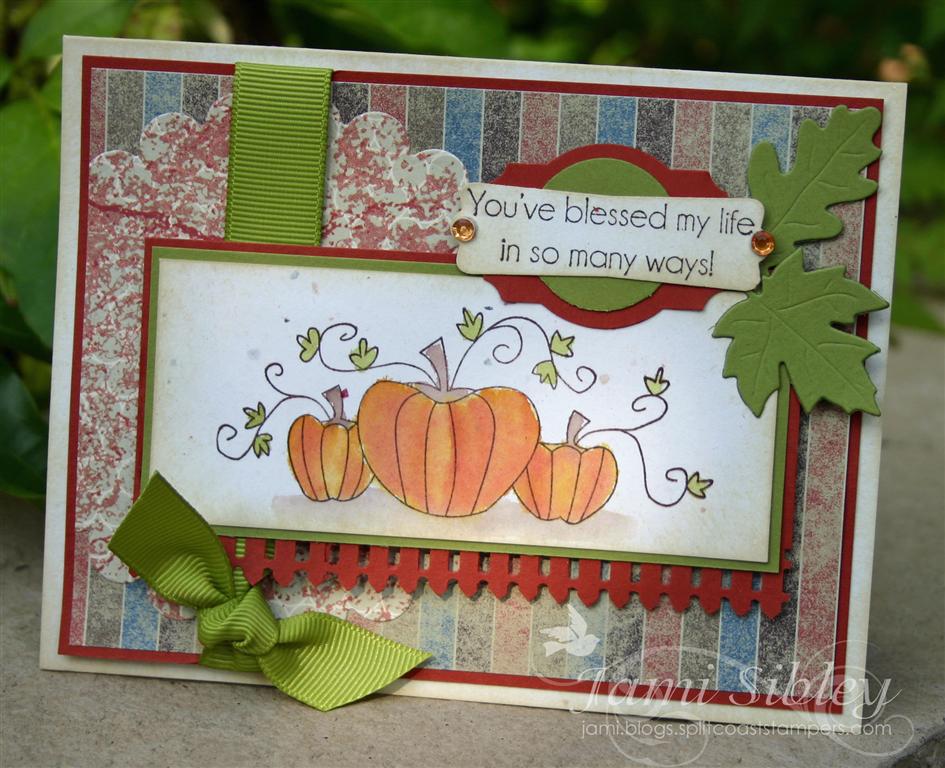
The pumpkin image was stamped onto Confetti White cardtsock with Timber Brown Staz-on ink and watercolored with an aquapainter and ink from SU pads and markers that had been smeared onto a cd to create a pallette. Colors used to paint are Peach Parfait, Cajun Craze, Old Olive, and Close to Cocoa. SU punches were used to layer the sentiment. The Martha Stewart picket fence border punch created interest under the image and the Mini Leaves Taylored Die set created leaves for the perfect finishing touch in the corner!
I won’t be teaching another class until January and it felt so weird when everyone left last night.
Roger/Tessa UPDATE:
Roger did great with the ladies at class last night. I had been really concerned how he would react to a house full of people. Everyone loved him. We have someone coming to meet him tomorrow. She is a co-worker of my Mom’s and I’ve never met her. I have to admit that we are having a hard time at this point with the idea of letting him go and it’s much harder when we don’t know the people personally. We had so hoped a friend would take him so we’d still be able to see him occasionally.

Tessa and Roger in the backyard yesterday. Caught these shots as I was photographing cards.

Roger. It’s funny – he looks more tan in photos, but in person he has quite a bit of black fur that makes him look more gray overall.

Tessa – my sweet girl!
So yes, Tessa is tolerating Roger somewhat better. And yes, we continue to feel very torn about keeping Roger vs finding a home for him. Practically EVERYONE has said we should keep him, which just makes the whole thing that much more difficult. To be honest, I’m pretty emotionally drained from this whole thing and just don’t have the energy to even try to explain everything I’m feeling and all the factors we are taking into consideration. Roger really is a great dog. He’s loving, playful and obedient. All that being said, Tessa has to come first. As things stand now, it’s likely he’ll be on his way to his new home tomorrow afternoon. Either way, I forsee an emotional weekend ahead!
I’ll be back soon to share my other two class projects. Thanks so much for stopping by today. I hope you have a wonderful weekend!
![]()
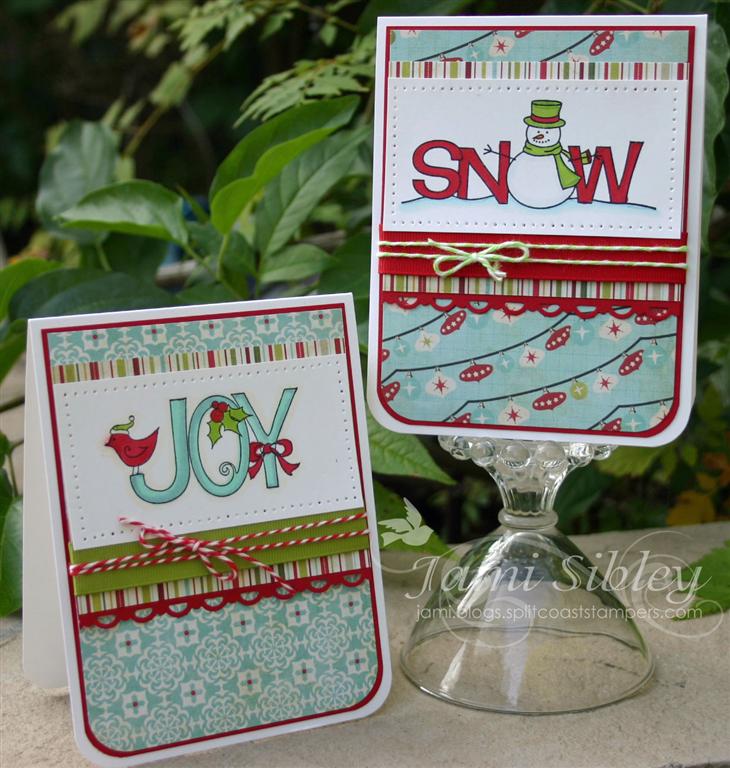
October Class
October 26th, 2011
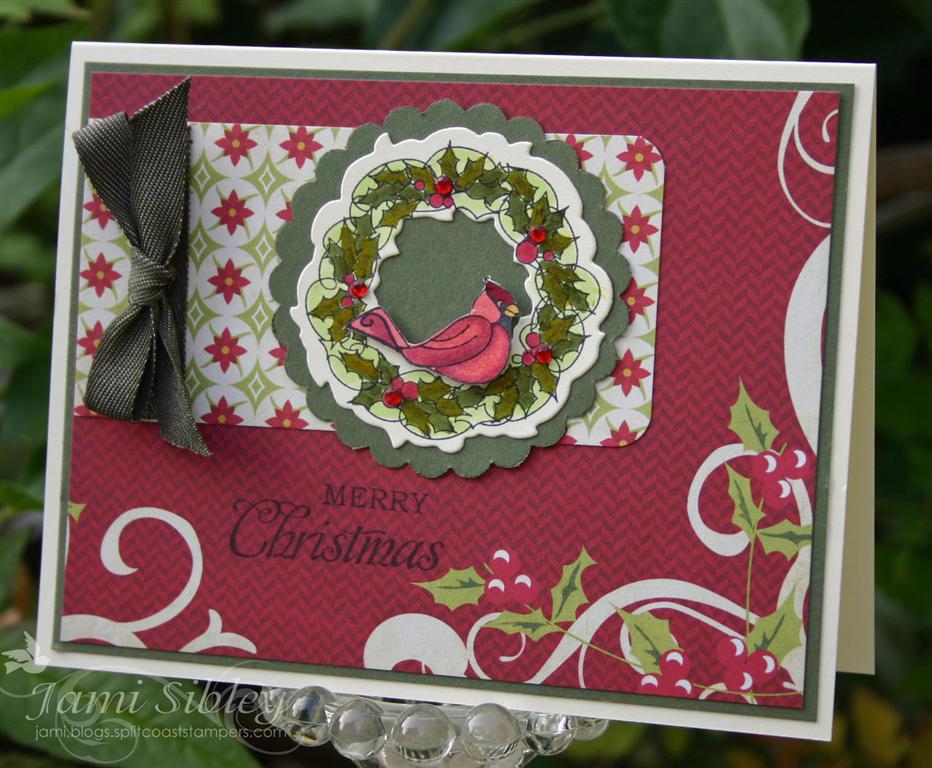
Happy Wednesday! I cannot believe that October is almost over. It’s been a crazy busy month here full of lots of good stuff. I’ll share more about that later, but for now I want to share the projects we made in my class last week. Our focus was Christmas and Winter and each customer got an Echo Park Seasson’s Greetings 6×6 pad with their class enrollment. Having such cute paper and so many awesome TE Christmas sets made it hard to narrow it down to just 3 projects. We might have to do a little more Christmas next month too.
The first card features Wreaths of Joy and the Seasonal Wreath die. The bird was stamped separately, cut out and popped up on a foam square. Cardstock colors are Buttercream and Artichoke.
The second card features the Trim the Tree Taylored Die along with the Frame It Up 1 Die. The sentiment was punched with the SU Modern Label punch. The scallop was created with the Medium Scallop Taylored Die. Cardstock colors are Pear Pizzazz, Cherry Cobbler and Buttercream.
And for the 3rd project everyone had the choice of using “JOY” from Wings of Joy or the “SNOW” A la Carte. This card was inspired by a beauty made by Karen Motz. Love this pair! Cardstock colors are Real Red and Choice Snow White. Images were colored with Copics and finished off with Spica Glitter pens.
I don’t think these cards need much explanation, but if you have any questions please let me know. My November class is scheduled for Thursday evening the 17th. Registration is $15. E-mail me if you’d like to attend. 🙂
Thanks for stopping by. I hope you’re having a great week!
![]()
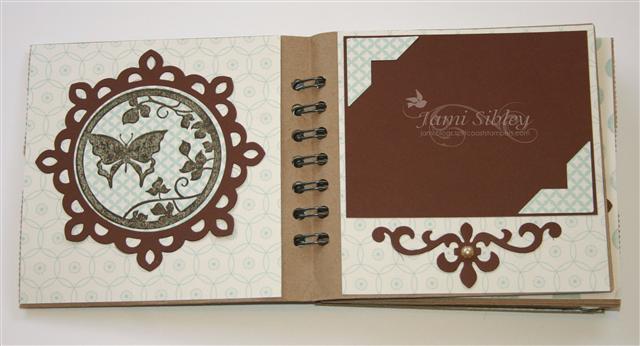
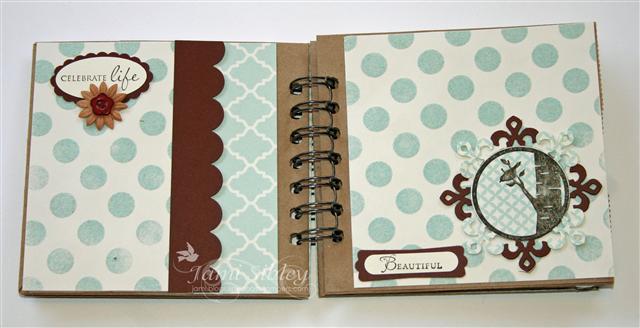
My First Paper Bag Album
September 29th, 2011
Happy Thursday! Sorry for the delay. I had hoped to have this up by Monday, but it’s just always somethin’. LOL!
I held my September Stamp Class two weeks ago and the project was a paper bag album – my very first paper bag album ever! I had gotten gorgeous paper kits from My Mind’s Eye (Lush Collection) and was dying to do a special project with them in class. During my August class I spouted off that we would make paper bag albums, despite the fact that I had never made one and at that point really didn’t have a clue as to how it was done. But I had wanted to make one for years and this seemed like the perfect opportunity to learn! I watched a bunch of videos on YouTube, which I was extremely grateful for, but ultimately chose a more simplictic approach that worked really well for me. The Rocket Scientist helped me put together a video to show you the album page by page as well as a little tutorial on how it’s constructed. I even have a couple of tips in case you want to teach something similar in a class like I did. I hope you enjoy it.
[youtube]https://www.youtube.com/watch?v=V3uVPvlora8[/youtube]
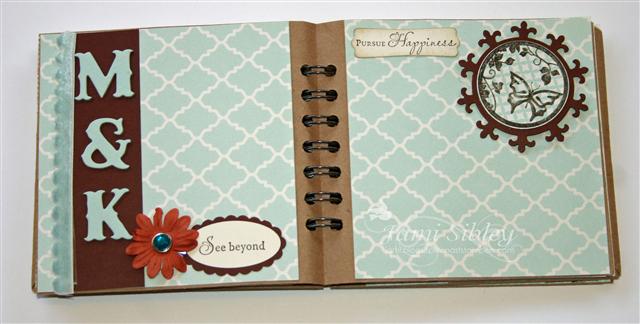
Some of the ladies in my class asked that I post still photos also for easy reference. So here’s the book, page by page.
Here’s the cover (the scallop is made with the TE Medium Scallop Die and the leaf is a SU punch):

Pages 1 and 2:
Pages 3 and 4 (under the scallop is a little pocket for a memento):
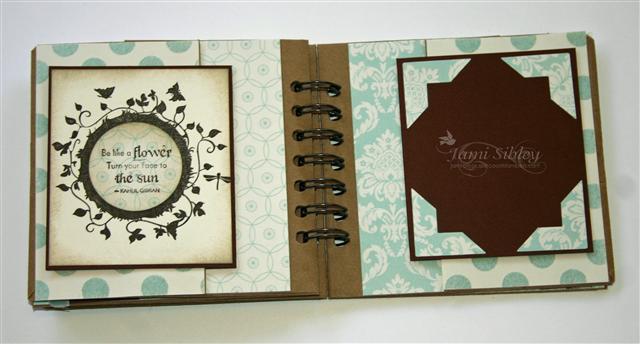
Pages 5 and 6:
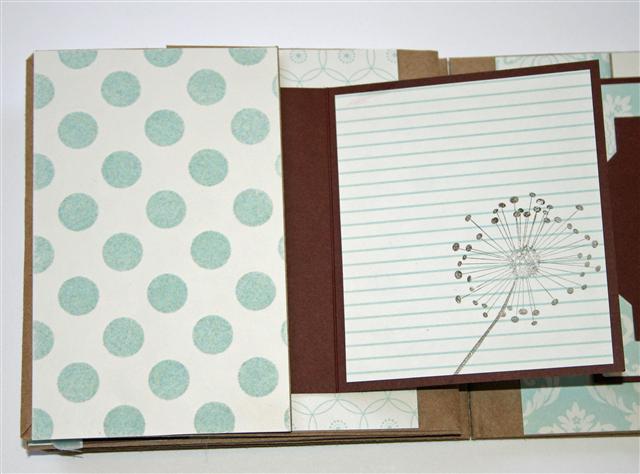
Pages 7 and 8 (these are little fold-over cards tucked into pockets created by the feet/flaps of the bags):
Page 7 – showing the journaling card open:
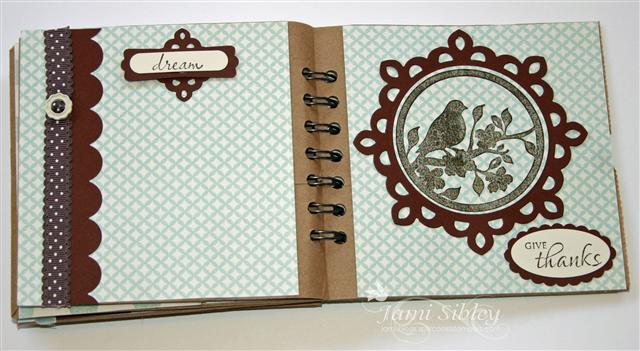
Pages 9 and 10:
The insert cards (these are tucked into the 3 bag top openings):
This project was created with 3 brown lunch sacks, the MME Lush kit, my Cinch Binding Machine, Spellbinders Fleur de Lis Dies and stamps from Taylored Expressions: Embrace Beauty, Summer Afternoon, Celebrate Life, Discover Your Wings.
I created mine for my niece and her husband who will be celebrating their First Wedding Anniversary soon with a little trip. There are plenty of spots to add photos as well as opportunities to journal about the trip. I hope they like it. I was tickled pink with it! I had so much fun with this project that I want to do one for Christmas now! Oh and did you see the card I created to go with it? Just scroll down one post or click here.
So tell me, have you ever made a paper bag album? If you haven’t, you really need to! Check out my video and let me know if you have any questions. I will admit that this was a big project for an evening class, but really it went pretty smoothly and I think everyone loved the result. Next month we’re back to cards though. 😉
![]()
August Class Cookin’ Card
August 25th, 2011
Happy Thursday! I wanted to be sure to share the third project from my class last week before too much times goes by. As soon as I saw the Now You’re Cookin’ A la Carte stamp and the Domestic Goddess designer paper in the SU catalog, I knew I needed them. First they remind me of my 40’s kitchen and second, I coordinate a Summer Supper program at our church and I knew they would be perfect for thank you cards for the team leaders!

I had this idea rolling around in my head and then I saw a card on JanTink’s blog that solidified it. At least I’m pretty sure that’s where I saw it because I can’t find it now. The image was stamped with white craft ink on Kraft (Crumb Cake) cardstock and heat embossed with white embossing powder. It’s SUO except for the little black scallop mat behind the image that I die cut with a Nestie. Looking forward to playing with that stamp some more!
Thanks for stopping by! I’ll be back tomorrow morning with a new Taylored Expression Sketch Challenge.
![]()


