New Crafter’s Workshop at Taylored Expressions
April 20th, 2010
Happy Tuesday! Taylored Expressions is hosting a blog hop today to showcase the new Crafter’s Workshop stencils now available. You’ll have a chance to see a few of the many opportunities for creativity in using these fun stencils by checking out several different blogs today. There are so many ways you can go with these stencils I can hardly wait to see what each person came up with.
I chose to work with the Daisy Doodad Template as I had an idea for it as soon as I saw it. If you’ve been reading my blog for any length of time you know that we’ve been doing lots of redecorating in our house over the past year. One of the things I’m still trying to complete is getting art hung on the walls. Back in January I went to Home Goods with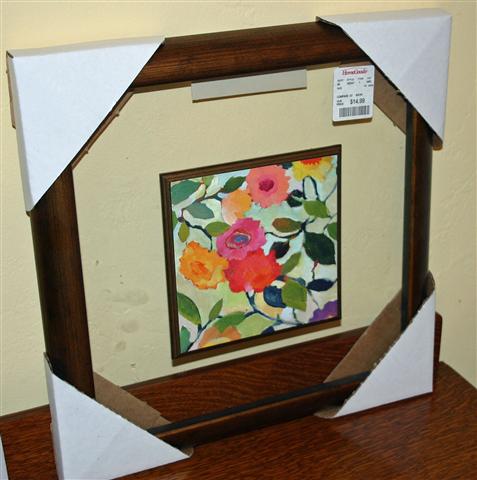 my very talented friend Kim and picked up a number of home decor items. Included in those items was some art that I planned to alter. I bought two of these pieces at $14.98 each. It might be a little hard to see in the photo, but the art work is mounted on a wood piece that floats on a sheet of glass framed by a bronze tone wood frame. I didn’t care much for the actual art and planned to replace that when I bought it. The art piece is 6″x6″ and the frame is 13″x13″.
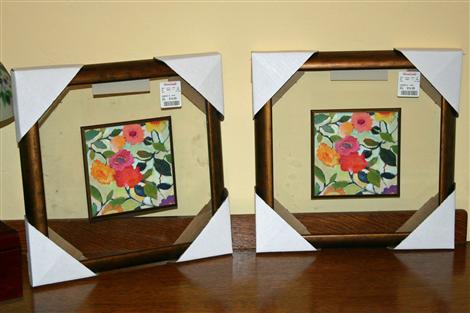
Here’s a photo of the pair.
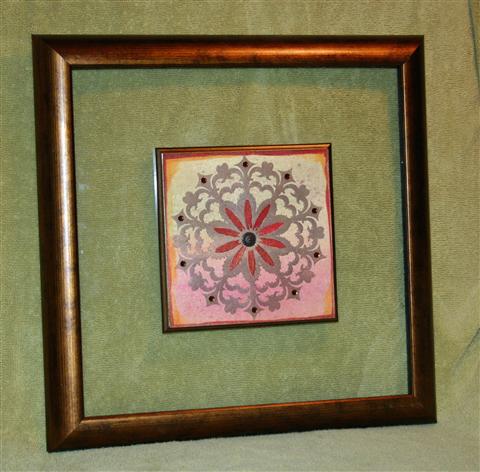
And here it is finished. I did finish both pieces, but unfortunately one of the frames broke as I was taking off the cardboard corners which were apparently stapled on by gorillas. Curt says he can fix it, but I couldn’t handle the piece to photograph it – so just know that there is a pair.
The really fun thing about this project was that I had no idea what exactly I was going to do. In fact my first attempt didn’t work out AT ALL. I really just played over a couple of days and ended up with this. So here’s the basic process I went through.
- I started with some paper from a big watercolor pad I purchased quite awhile ago. It’s quite heavy and I knew it would withstand a lot of *working*.
- First I scribbled watercolor crayons to cover my 6×6 piece of watercolor paper. I used Burgundy, Rose Red, Ruby Red, Saffron, Artichoke and Moss to coordinate with my decor.
- Then I washed all of that with my aquapainter, added a little more crayon and brushed more water.
- The whole piece was then covered with Gold Maya Mist
- Then I moved on to some Twinkling H2O’s. I splattered some of that on with a toothbrush and I painted the edges with 2 colors.
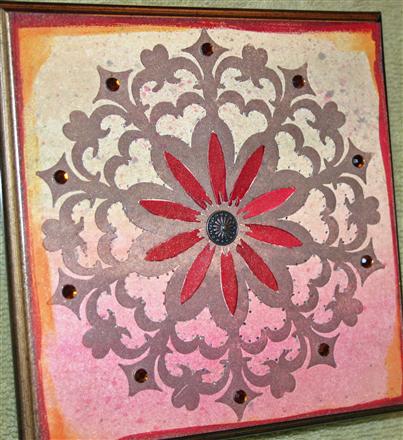
- Finally I get to my stencil! I covered my stencil with Brilliance Pearlescent Chocolate ink by simply taking the dew drop and patting it all over the stencil.
- I placed my painted background piece (still just slightly damp) face up on the platform for my Big Shot and then laid the inked stencil face down on top of it. I covered that with a piece of scrap cardstock before running it through the Big Shot. This acted as a letterpress and the stencil was embossed into the paper and a beautifully inked impression was achieved at the same time.(The ink washed off the stencil easily with running water in the sink.)
- I painted the petals with Twinkling H20’s ad added a decorative brad to the center. It’s hard to see in the photo, but I added piercing around much of the design. The piece was finished off with some KaiserCraft rhinestones around the edge of the design.
The combination of Twinkling H20’s, Maya Mist and Brilliance Pearlescent ink makes this piece very shimmery IRL!
I’m so excited that I got to play along today!!! Now I’m dying to see what everyone else did. How ’bout you….you coming?
- Alex Maldonado
- Carolina Buchting
- Charmaine Ikach
- Jackie Pedro
- Jeanie Witmer
- Jodi Collins
- Karen Giron
- Karen Motz
- Melissa Sauls
- Sankari Wegman
- Taylor VanBruggen
At only $3.99 each these stencils are a steal and I’m pretty sure you’ll need more than one! *wink* Thanks for stopping by! I’m on my way to the office soon. Hope you have a wonderful day!


April 20th, 2010 at 10:03 am
Turned out beautiful, Jami!!
Gorillas really shouldn’t be given staplers, it’s just not good sense. LOL!
April 20th, 2010 at 11:06 am
OH Jami – how creative! I love this idea and what a fun way to personalize artwork for your home. Love it!!!
April 20th, 2010 at 11:48 am
Jami, this is gorgeous!! And what a clever idea to use the template for a home decor item!!
April 20th, 2010 at 6:09 pm
Holy cow Jami, that is absolutely STUNNING!!! What a beautiful piece of artwork and I thank you so much for going through the steps!!! What a bummer the other frame broke but I got a good old laugh by it being “stapled by gorillas,” LOL!! Hope the hubby fixes it for ya!
April 20th, 2010 at 8:25 pm
Jami, this is such a clever idea!! Your home decor project turned out just gorgeous!!
April 20th, 2010 at 11:35 pm
Way to go, Jami!
Your version is much more worthy of wall-placement! I honesly love what you’ve done with the new stencils, and your wall-hangings!
So, just let me know when you’re in the neighborhood … and I’ve got a few walls for you to handle! 😉
((((hugs)))
tex
April 22nd, 2010 at 9:15 am
This is GORGEOUS Jami! What a FABULOUS piece of artwork for your walls! LOVE this!
April 24th, 2010 at 5:52 am
Just gorgeous, Jami! What a perfect use for this stencil!
April 24th, 2010 at 8:21 pm
What a lovely frame Jami! Love the colors and the brads are the perfect touch. Thanks for the step-by-step.