TECC43 Cupcake Thank You
November 21st, 2008
Happy Cupcake Friday! Surprise! I actually have cupcakes this week for the Taylored Expressions Cupcake Challenge (cupcakes not required – get all the details on Taylor’s blog here.) I got the SU set Crazy for Cupcakes in my October Club order and this is the first chance I’ve had to ink it up. How can anyone resist this adorable pile of yummy cupcakes?
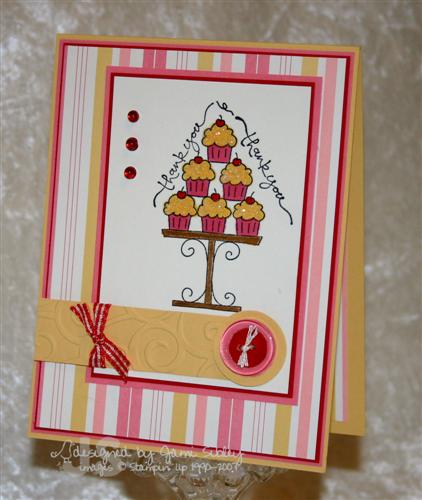 This card is super simple and probably doesn’t require much explanation. The image was colored with Copics plus I used a retired SU metallic pencil on the tray. The frosting was covered with a Sakura Quickie Glue Pen and Dazzling Diamonds Glitter. The cherries have clear glaze pen to make them shiny. I used a clear button over layered circle punches for the circle element and the horizontal strip was run through my Cuttlebug with the Swirl embossing folder. The color combo came from the Georgia Peach dp. I started to acent with black (you know my old *Fall Back on Black* rule!), but then I decided to go with the red from the cherries for my accent color. I love how that turned out.
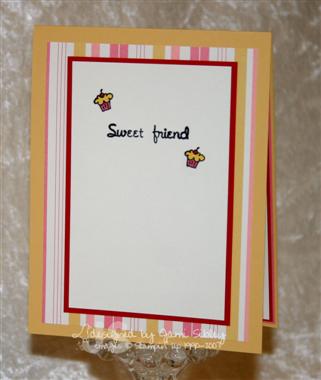
I wanted to finish off the inside of my card too. I love how the tiny cupcake from Short & Sweet coordinates with this set. The sentiment *Sweet friend* from SASI Sweet Celebration seemed just perfect to finish this thank you note.
Recipe:
stamps – Crazy for Cupcakes, Short & Sweet, SASI Sweet Celebration
paper – So Saffron, Regal Rose, Real Red, White, Georgia Peach dp
ink – Memento Black
other – clear button, white embroidery floss, circle punches, Cuttlebug, red gingham ribbon, dazzling diamonds glitter, clear glaze pen, Adorn-it red jewels
I hope you’ll check out the sketch and play along with us this weekend. Let’s see what the rest of the Cupcake Crew has cooked up.
This week’s Featured Stamper is Laura Frederickson at Scrapnextras. Make sure you have a cup of coffee and time when you hop over to her blog. You’ll want to stay awhile for sure! Also be sure to check Our Friday Friend on the SASI blog. Gosh – aren’t Fridays GREAT? *grin* Thanks for stopping by. Have a fabulous weekend!

Frosty for SC203
November 19th, 2008
It is SOOOO good to be home! No matter how much I love a vaction I’m always glad to get home! I woke up with a bit of a sore throat so I stuck around the house today doing laundry and such. I’ve been dying to stamp so I had decided last night that I would make time today to sit down and do the SCS Sketch Challenge. It was a fun layout to work with.
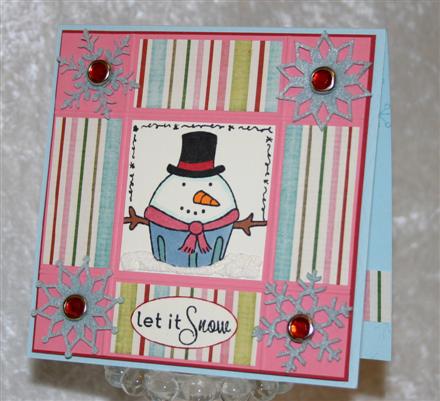
My card is 4.25″ square and the focal point is Frosty from Home Sweet Home a Stamp a Sweet Impression set by Taylored Expressions. He was stamped with Memento Black ink on Choice Natural White cardstock (from TE) which is a soft ivory/vanilla color. I colored hom with the Copics pictured below to coordinate with this fun designer paper from the Christmas Key Ingredients pack. 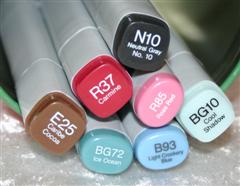 The snow under Frosty is white Liquid Applique covered with Dazzling Diamonds glitter and then heated to puff up.
I started this card with a 4″ square panel of Regal Rose cardstock and using my Scor-It I scored lines 1″ from each edge all around. Then I adhered the strips of dp and the focal image. The Rose panel was then layered onto a Riding Hood Red panel cut just 1/16″ larger. Felt Flurries (SU) snowflakes in Baja Blue were added along with red rhinestone brads. The sentiment (from Home Sweet Home) was stamped and punched with the SU small oval punch. I was going to layer it onto a Riding Hood Red large oval, but it didn’t look quite right, so instead I simply scraped the edge of the small oval in the RHR ink pad to give it a bit of a faux-layered look. The Rose/Riding Hood Red panel was then adhered to the blue (cardstock from Key Ingredients) base using foam tape.
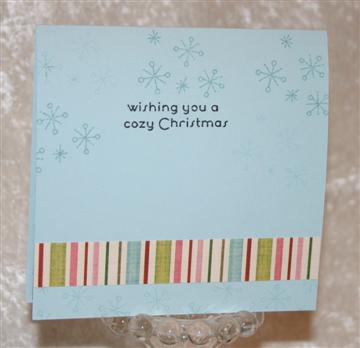
The inside of the card was finished off with snowflakes and a strip of dp along with the sentiment.
Be sure to check out the cute creations over on the SASI blog! And if you’d like to be considered for Our Friday Friend over there, be sure to upload your SASI creations to the SCS gallery using the keyword SASI.
I want to give a HUGE SHOUT OUT and offer my heartfelt congratulations to my friends Joy and Cami and their partner Kimberly on the launch of their new stamp company Our Craft Lounge! Have you seen their stuff yet? I’m so excited for them and proud of all they have accomplished in a short time. You ladies ROCK! Sorry I’m so late to the party! I don’t have the sets I ordered yet, but I hope to play with them soon!
It’s back to work for me tomorrow. Thanks for stopping by!
Heading Home
November 18th, 2008
We’re packing up to go home and I’m ready to be there. Six nights is longer than I’ve been away for many years. While I love to take trips, I prefer them to be short – usually 3 or 4 nights. I actually have a little project to share today. I brought these little gifts to the girls who stayed at Sharon’s (all except Taylor – that’s what you get for keeping secrets! *wink*)
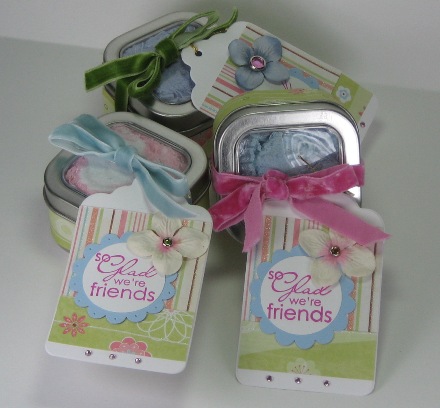
I ordered these tiny tins from Specialty Bottle. I’m not very good at picturing the size of things so I *thought* they would be the perfect size for the soft fuzzy bootie socks I had purchased. As it turned out I had to roll up the socks and STUFF them in these little tins. LOL! The tags are from TE and the dp is Imaginesce from eP. The yummy velvet ribbon is from TexasJodyLynn and the sentiment is from a SU hostess set.
The past couple of days we’ve been total tourists visiting Dealy Plaza and the School Book Depository in Dallas and the Stockyards in Fort Worth. For me visiting Dealy Plaza was the experience of a lifetime. I wasn’t even 2 years old when President Kennedy was shot, so I don’t know why I have always been so interested in him, his Presidency and the assasination, but it has always completely fascinated me. Yesterday at Dealey Plaza we met a man who claims to be an eye-witness. He says he was 13 years old and there with his family and he even carries a photo that shows him in the background. I don’t know if it’s true or not, but we found him completely captivating. We talked with him (along with a few other tourists) for over half an hour. He whole-heartedly believes that Oswald was not the actual assasin. I’ve never wanted to be a conspiracy nut, but I’ve also never really bought the Warren Commission explanation. Even my completely logical and scientific skeptic husband had his doubts by the time we were done there!
Here’s a photo of Curt (yellow shirt and jeans) on the grassy knoll.
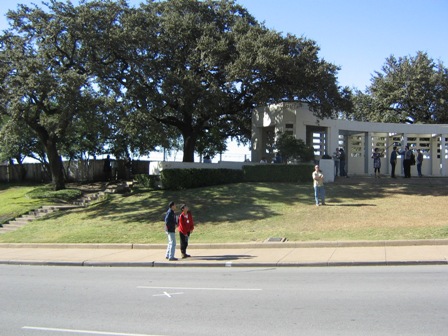
To the far left you can see a wooden picket fence and that’s where there were supposedly one or two additional shooters. There are paint marks on the back side of the fence to indicate their positions. There is a white “X” in the street marking the spot of the President’s car when the last fatal shot hit him.
Curt went out int he middle of the street and stood on the “X” to take this photo of the Book Depository.
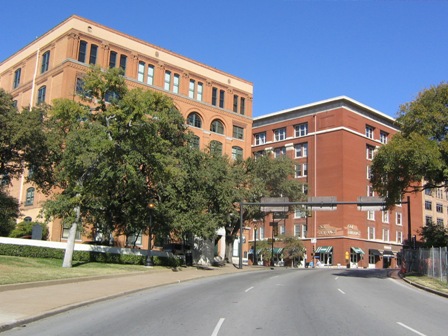
It’s the building closest to us and the window the shots came from is on the 6th floor (2nd down from the top) on the far right. The museum inside is very interesting as well and we spent almost 2 hours there. It really brought home the deep emotion of the nation at the time of the assasination. This weekend will be the 45th anniversary and apparantly a lot of the living eye witnesses will come to the grassy knoll. I wish we could be here for that, but I’m very gald we got to come when it’s relatively uncrowded.
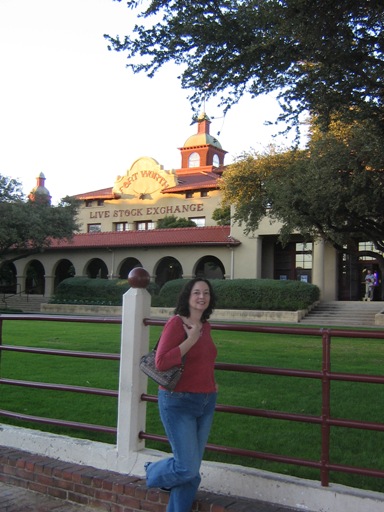
Yesterday we hung out with Meg and her friend Cyndie at the Stockyards.
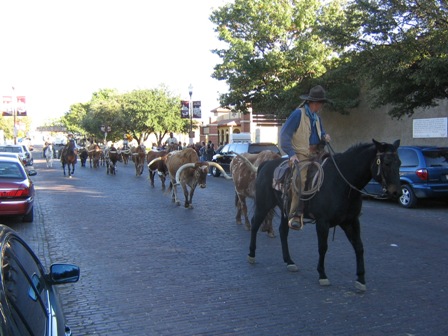
At 4:00 everyday they have a cattle drive. It was fun to see some longhorns up close.
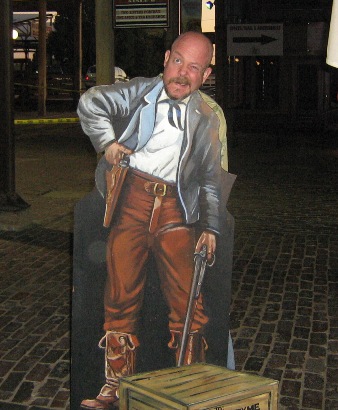
And here’s Curt as a cowboy!
Texas has been a blast, but this California city-girl is ready to get home. Thanks for coming along with me. I might have a few more pics to share after I get home. And I’m seriously dying to do some stamping!
Texas Serendipity
November 16th, 2008
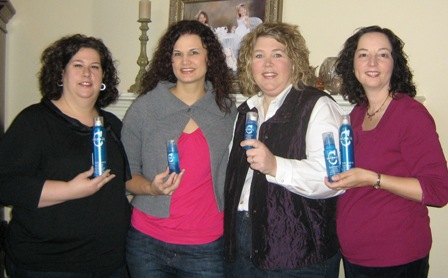
The first part of my trip to Texas was all GIRL time! Left to right in this photo are Tex, me, Jess, Taylor, Lori, Jenn and Sharon.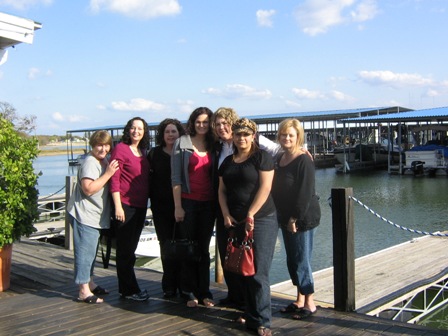 This trip was the serendipity of intersecting vacations! It went something like this – Curt and I were wanting to plan a vacation for October or November. One of our options was a trip to DFW to visit Megan and Gary – we’ve been talking about doing this for 3 or 4 years. At one point I had hoped to go to the Copic training in KC back in October to meet up with Lori and Sharon, but then that just wasn’t working out. One day Lori mentioned that she might go visit Sharon in November and a little light went off over my head. I asked Curt if he’d like to go to Texas and he said “SURE!” so I called Lori to see if she was really headed to Sharon’s. WooHoo! Then I remembered that Jess had been talking about visiting her parents in Dallas, so I called to see if she might be able to make her trip coincide with ours. About that same time Lori talked to Jenn who said she’d either drive over or maybe hop a plane. From there it took a little finagling around hunting season, a marathon, the SASI holiday release, a DH birthday, a wedding, and several other things, but we were finally able to make things coordinate. Sharon was so gracious to invite us all to stay at her lovely home. She truly was the hostess with the mostess! And since Tex was just about 45 minutes away she was able to hang out with us as well.
Now the whole Taylor thing…well let me just say that’s just about the most surprised and dumbfounded I have EVER been! I had mentioned the trip to Taylor at one point and said “you should come”, but she never really seemed interested and I knew full well how busy she was with TE/SASI so I didn’t push. When she jumped out from behind a pillar at the DFW Airport you could have pushed me over with a feather! That little sneak! Oh and she actually brought cupcakes in adorable handmade boxes – how cool is that?! No one knew about her coming except Sharon.
If you were reading my blog back in the Spring when I first got my perm you know how much I love Curls Rock products. Well it was Lori and Jess that got me started on them. Since Taylor has naturally curly hair we made her try them too so we could take a “Get Kinky at Sharon’s” photo.
Unfortunately my perm is getting a little worn out so it’s no match at the moment for my naturally curly friends! LOL! I’ve already scheduled a root perm to fix that!
I got to spend Wednesday night through Friday night with the girls. Friday afternoon Tex took us out to see her FAB studio (my pic there is blurry unfortunately) and to Hobby Lobby (my first time there) before going out to dinner where Curt met us when he got off his flight. I’ll be back late with more about the *me and Curt* part of the trip – I need to take some more pictures. Thanks for stopping by and sharing in my travels. I really need to make myself a travel journal!
Life on the Farm
November 15th, 2008
Just a very quick late night post to say “Howdy y’all” from Texas. 🙂
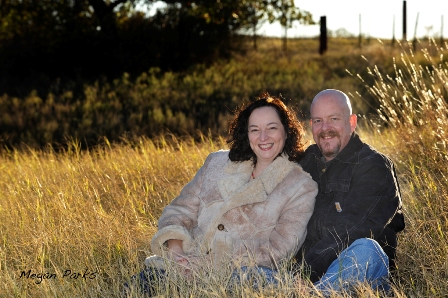
I’ll have more to share later – so much fun here – but I couldn’t wait to share a couple of photos from today. We spent the day with Megan (Curt’s cousin) and her hubby Gary at their farm in Weatherford. Chickens, horses, miniature horses, ducks, dogs, canaries and a Lorikeet – this city-girl was in heaven. Even better than all that is that Megan is a professional photographer (see www.meganparks.com ) and she offered to take our portraits on the farm. It was cold and very windy today, so after taking great care to pick out outfits for our pictures we ended up wearing Megan and Gary’s coats in most of the shots. LOL!
Megan was super sweet to very quickly pick out a couple of her favorite shots and give them to me with minimal editing so I could share here right away. Here I am with Drifter, an adorable miniature stallion wearing a bejeweled bridle. I had so much fun with him for these shots.

And here’s one of Curt and me.
Megan is a wonderfully talented photographer and so great to work with. Wow – maybe it was just the *diva* in me coming out, but I loved the photo shoot. Curt could hardly believe that prissy-me just plopped down in the field wherever Meg told me to! (Oh, and she’s an awesome cook too!) If you’re in the DFW area and would like to schedule a photo shoot I can highly recommend her!!!
Bedtime for me – way past actually. Thanks for stopping by. I’ll have more soon.
Gourmet Cocoa
November 11th, 2008
I have another class project to share. A few weeks ago Debbie Olson very generously shared a template on her blog for a cocoa packet card. You can see her post and her template here. I thought this would be a great project for my upcoming class and just a day or two later I happened to be in Tuesday Morning and saw a box of gourmet hot cocoa mix – jackpot! You never know what you’ll find at that store! Of course the packets were sealed in a box so I couldn’t actually see them till I got home with them. When I opened the box I discovered they were a different size from what Debbie had used – much skinnier. So I set out to re-work the template to fit my packets. Working from Debbie’s original it was fairly easy to adapt to the size I needed and then my wonderful hubby made my hand-drawn version into a computer template.

I printed the templates out directly on Kiwi Kiss cardstock and everyone cut and scored their own card. We used Ski Slope dp and paper pieced the cup from Pun Fun.
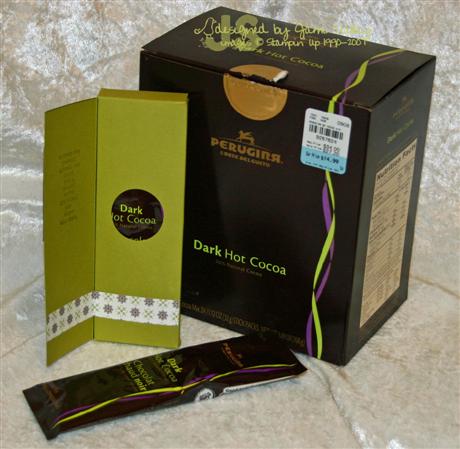
This turned out to be a really fun sized box – 2.25″ x 6.5″. It’s funny because after making this I remembered I had purchased a stamp several years ago at Rubber Stamp Convention that stamped an image of a template for this same idea only smaller, yet it had never occurred to me to adapt it to something larger. Here’s my template if you’d like to use it.
Since it’s based on the one Debbie made I will reiterate what she said when she shared hers on her blog,
“Please feel free to use it and share it for personal projects, but I would ask that no one submit to publications with it. Thank you! “
Thanks for stopping by!
Project Supplies:
Template from Jami (or larger size from Debbie Olson)
Stamp sets:
Wishing You Cheer pg 37
Pun Fun pg 61
Short & Sweet pg 146
Ski Slope Designer Paper pg 12 of the Holiday Mini
Cardstock: Real Red, Kiwi Kiss, Whisper White
Classic Ink: Chocolate Chip
Punches pg 188: 1 3/8 circle, small and large ovals
Ribbon: Kiwi Kiss 5/8” striped grosgrain pg 186
Tea Light Tin
November 9th, 2008
I promised to share my class projects from Friday so here I am with one of them. You might remember the candle and tea light tin I created for the Christmas SASI release. Well, as soon as I completed it I knew it would adapt into a perfect class project.
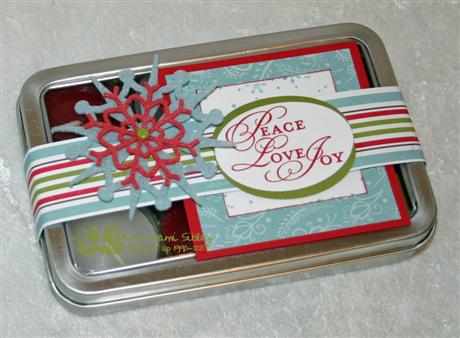
So here’s my Stampin’ Up! version using Ski Slope Designer Paper and the Little Felt Flurries. WOW – I am LOVING those fun felt snowflakes!!! The sentiment was punched with the Wide Oval Punch and then layered onto two Olive Wide Ovals. In addition to the tin filled with six tea lights you’ll notice a matching 3×3 gift card tucked in behind the belly band and framing the sentiment. Here’s a photo with the little card pulled out.
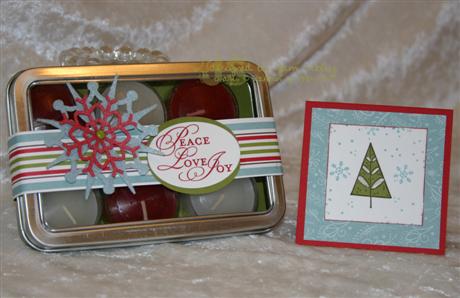
We paper pieced that adorable little tree from Merry & Bright. We also created a very simple insert using Old Olive cardstock which gives the inside of the tin a more finished look and helps keeps the tea lights from sliding around so much. This was inspired by Nicole Heady’s tag tin.
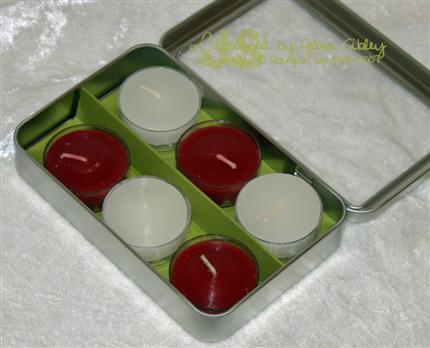
The insert is 4.75″ x 5.25″ – folded in the middle and then scored .75″ away from the middle on each side. Then we punched with a corner rounder. Easy peasy! While the project we made in class is a wonderful complete gift on it’s own, you know me…More is More. *wink* I decided to decorate a coordinating pillar candle as well. I was thrilled to find this silver pillar at Michael’s and of course I burned and hollowed out a hole on top for a tea light.
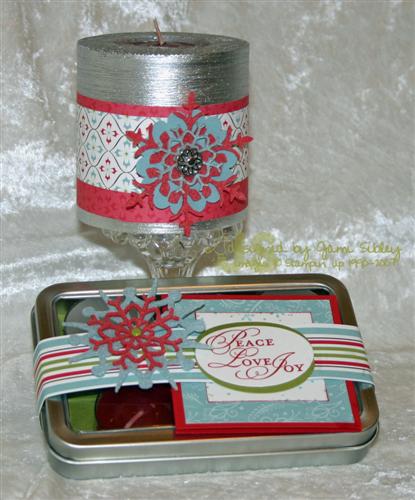
The pillar candle seriously took me less than 10 minutes to decorate (after the hole was hollowed out – that took a little time) and isn’t this just a wonderful little set? I’m really excited to give it as a Christmas gift!
Project Supplies:Hinged clear top tin + 6 tea lights
Stamp sets: All Holidays pg 142, Merry & Bright pg 37
Ski Slope Designer Paper pg 12 of the Holiday Mini
Cardstock: Real Red, Old Olive, Whisper White
Classic Ink: Riding Hood Red, Baja Breeze, Chocolate Chip
Little Felt Flurries pg 18 of the Holiday Mini
Wide Oval Punch pg 188
Brad (Olive or Silver)
White Gel Pen
I’ll be back tomorrow with another class project. Thanks for stopping by!


