Snow
October 7th, 2007
Portland preparations are in full swing! This is going to be some trip, let me tell ya! Hangin’ out with 14 fabulous SCS friends for 3 days and then Curt joins me to celebrate his birthday and hang out with my best friend in life since high school for a couple days. Wow!
Just a quick post to share the third card we made in my class on Friday using Big on Christmas. This card is a combination of two totally different cards I made a couple of weeks ago as well as the card JanTink submitted to my New Catty Swap. Inspiration is everywhere!
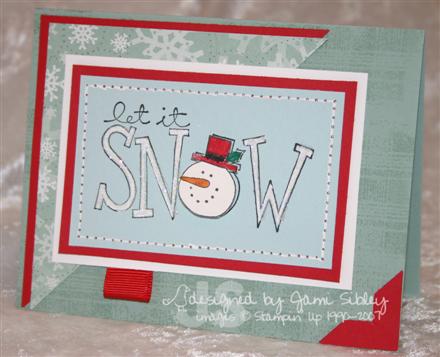
Base is Sage Shadow stamped with Flannel Plaid tone on tone. Designer paper is from the Wintergreen line by SU. The image is stamped in black on a Soft Sky panel and colored with a white gel pen and then glittered with Dazzling Diamonds using a 2-way glue pen. The image was stamped again (partially) on a scrap of shimmer white and the snowman was colored with markers and cut out and then popped up on foam tape. Faux stitching, a photo corner punch and tab made with the 5/8″ red grosgrain are the little finishing details. I just love this color combo of Sage, Sky, white and Real Red for pop!
I doubt I’ll get much stamping done this week. Please bear with me if I don’t post much over the next 7-10 days. Thanks for stopping by!
October Technique Class
October 5th, 2007
My class tonight was a ton of fun! A couple of the cards took a little longer than I expected, but it’s always so hard for me to estimate how long it will take other people to re-create a card. I was super happy with all three designs for tonight.
The first is a CASE of a card I saved to my Favorites gallery at SCS awhile back using the Faux Tearing technique. It’s such a simple technique with such a wonderful result. I was so happy to see that after I had initially saved it MicheleTx edited her upload to include a link to her blog tutorial. Since it’s such a great tutorial I won’t even try to explain this technique – just click that link to see how it’s done.
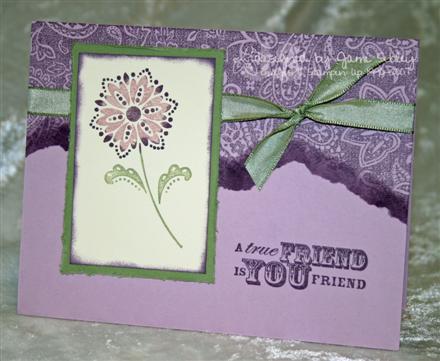
For my card I changed the colors to Pale Plum, Perfect Plum, Mellow Moss and Vanilla and I changed the stamp set to True Friend. We sponged Perfect Plum around the edge of the vanilla panel and we distressed the moss panel with the SU Cutter Kit distresser. The flower was colored with markers and given a good strong huff!
This next card teaches the Hot Card technique. I originally learned this technique from the Monday challenge on SCS – the Technique Lover’s Challenge hosted by my friend Beth (showmestamper). I’ve been wanting to work it into my class for awhile and the Snow Burst set seemed perfect for it!
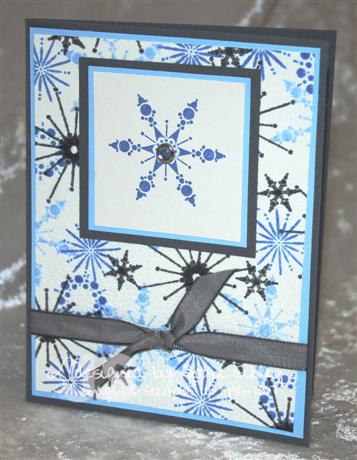
It’s hard to get a good photo of the texture on the background of this card, but it is super cool in real life! To achieve this, stamp your desired background on a piece of white tissue paper. Crumple up the tissue into a ball and then gently uncrumple. Place the tissue over a piece of clear plastic wrap (such as Saran Wrap) and then over a piece of white cardstock (the plastic wrap will be in the middle). Place the *sandwich* between two pieces of parchment paper (found in the baking section of the store) -so as not to ruin your surface – and iron with a hot iron until the plastic melts. Allow to cool and trim the edges and you have a beautiful background for a card! In class tonight we did quarter sheets, but you can do full sheets and simply cut them to make several cards.
Colors used for this card are Basic Gray, Bashful Blue (cs and ink) along with Brocade Blue (ink) and shimmer white (cs) for the focal image. A blue rhinestone brad and gray tafetta ribbon are the finishing touches.
Wow I’m extraordinarily tired! Thanks for stopping by. I have one more class card – I’ll try to get it posted tomorrow. Good night.
Surprise Pop Up Ronnie
October 3rd, 2007
Have you ever made a Surprise Pop Up card? (Click here for the SCS tutorial.) Well I have. Once. And I doubt I’ll ever do it again. LOL! Don’t get me wrong – it’s an adorable idea and truly not that hard, but I doubt I’ll undertake it again. When I had my stampin’ buddies over a couple of weeks ago I had asked Leann (elyoho) if she would teach us how to make a Surprise Pop Up (so I wouldn’t have to read the directions *wink*). It was pretty hysterical to see a group of women – mostly SU Demonstrators and all very talented – saying “what?” and “measure where?” over and over again! Leann was a very patient teacher and we all had fun! I had orginally thought I would teach this in my SU class this month, but no -not so much (sorry ladies!) Cards that require *engineering* are just not my forte’.
I simply put together the pieces of the card itself when Leann was here (cardstock colors are Regal Rose, Certainly Celery, Real Red and Old Olive). I did all the decorating a week or so later – using one of the Ronnie images I colored that day with Copic markers. Here’s the finished card closed –
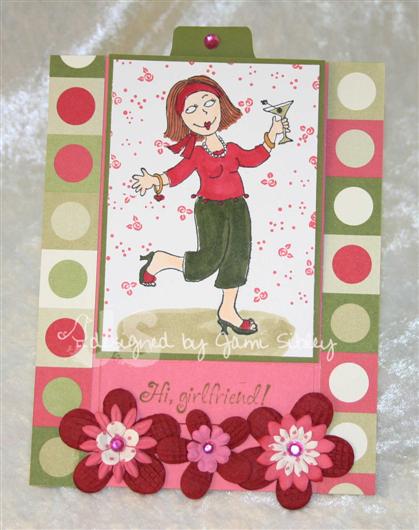
I used strips of Dashing designer paper along with Primas and K&Co. adhesive jewels to pull it all together. Here’s the card open –
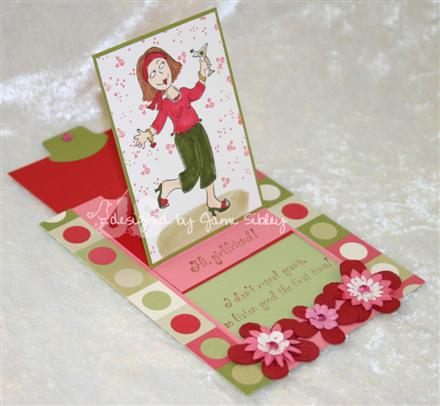
The sentiments are from Inky Antics and say “Hi Girlfriend” on the front and “”I don’t repeat gossip, so listen good the first time” on the inside. I decided that I’ll write my personal message on the red pull out tag. I think this card design would also be great for party invitations. Give it a try (just don’t ask me to explain it!) 🙂
I have been shopping every chance I get lately. You may remember that I brutally cleaned out my closet a few weeks ago and being at my top weight (sobs) I had very few things that fit – especially for the weather on my upcoming trip to Portland. As of this afternoon I finally feel like I’m pretty set. I just need to go over everything in detail this weekend so I can get any missing detail items on Monday. I have to say – it was hard to shop for cool weather clothes today when it was 89 degrees out and I felt like I was having some sort of hot flash the entire time I was shopping. I so look forward to cooler weather and being able to wear these clothes at home! I love Winter in SoCal!
This Friday is my Technique Class. Samples are all prepped (yea me!) so I just need to cut the cardstock and get everything together Friday. I’ll share those cards over the weekend. This morning I started working on samples for my November Class – A Dashing Christmas – and I’m really excited about it already!
It’s been a long, busy day and I’m exhausted. Good night friends. Thanks for stopping by!
Spooky Challenge
October 2nd, 2007
Awhile back I received a very fun piece of snail mail. It was an envelope from my friend Jen del Muro (better known to some as genie1314 and thus I call her Genie/Jen) the illustrious inventor of the Genie Bag and stamper extraordinaire. Oooo…a handstamped RAK? No, just a lonely single stamped image with instructions. How cool! She decided to mail out a challenge to 10 friends to make something with the image in the envelope – like I did a few months ago with Stampin’ Fun For Everyone.
This cute Halloween image Night Things is from Penny Black. I don’t really *get into* Halloween in general but I was more than happy to play in this challenge…only problem was that I had no Halloween designer paper or sentiments. But that’s ok – I’m all about *making it work*.
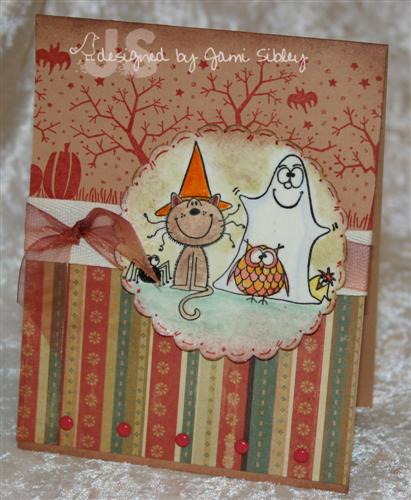
I grabbed a scrap of Cosmo Cricket paper that I bummed off Taylor last time she was here (thanks T!) and decided the Fall color scheme would work for Halloween. Card base is Creamy Caramel and I stamped the Spooky Skyline wheel across the top in Ruby Red ink. I was stressed about coloring the image since I only had one – what if I messed up??? I ended up using watercolor crayons and then punching the image with my Marvy Giga Scallop Circle punch. The whole piece was then covered with Versamark and embossed with clear embossing powder for a very cool shiny finish. A little twill tape and copper organdy ribbon along with some Ruby Red brads and I was done. Thanks so much for including me Genie/Jen! And be sure to check her blog on October 5th when she will post links to everyone’s projects. I can’t wait to see what everyone comes up with!
Oh and talk about happy mail – check out what I got today!
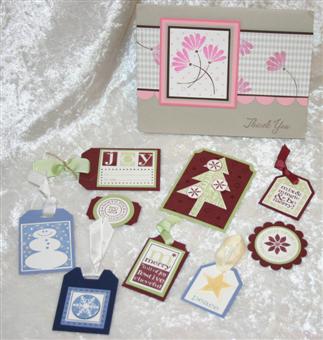
Elaine Schader sent me this wonderful assortment of tags and card candy along with this adorable thank you note for my last swap. Each one is a wonderful little work of art and I was so excited to receive them. Thanks Elaine! I am going to have fun creating cards with these.


